1. The Collaborative Organization (CO)
COmanage is a multi-tenant tool. This means that for each installation, one or more top-level tenants can be expressed. Each is called Collaborative Organizations or CO objects. Individuals are added to these fundamental objects, but once there, they can be included in multiple sub groups of the CO.
The term “Collaborative Organization” or CO refers to any formal or informal group of individuals that work collaboratively in a digital setting. They have a goal of a shared infrastructure that supports their collaborations so that the traditional limitations of localized applications may be overcome. In the last lesson, we referred to this group of individuals as “your organization or collaboration.” Going forward we will just use the term CO .
Some traits of these CO include:
- These individuals use a common workflow for adding collaborators.
- They share common policies for vetting the identities of collaborators.
- They may include individuals in a single organization, or individuals may be in multiple organizations, geographically different regions, or even work independently.
While COmanage can support multiple CO , it is rare for deployers who are just getting started to have more than one. During this workshop, each of us will be working with just one CO .
Administrator Roles
COmanage Registry defines several types of administrators.
CO Administrators
CO Administrators are super users within a CO. The types of activities that they can do to a CO include:
- Configuring
- Adding people (using an enrollment workflow. (We will talk about these in a future lesson)
- Managing its information for the people connected to the it
- Creating and managing sub-groups within the it (we will be talking about these sub groups in the next section.)
- Connecting it to provision applications to enable/disable their access and use by those in the organization or collaboration
Other top-level administrators
CMP Administrators
(aka Registry Admins)
CMP Administrators (COmanage Platform Administrators) are effectively super users, with the ability to perform almost all operations on the platform. The types of activities that CMP Administrators can do in a CO include:
- Configure the COmanage platform including creating new COs
- and everything that a CO Administrator can do EXCEPT for adding people using an enrollment workflow (unless the CMP Administrator is explicitly granted this permission in the workflow.)
System Administrators
System Administrators have privileges that enable them to maintain the COmanage application. These capabilities include the ability to provision cluster resources (for example, hardware, virtual machines, etc), Register and maintain IP Addresses, administer application upgrades, manage and conduct operating system upgrades and conduct backups.
CO Planning
Before we create a CO, we will review the properties that can be set for them. Once we have reviewed these fields, we will sign into our virtual machines to create a CO.
Most CO Settings only make sense in specific contexts and may need additional set up to take effect. For example, the automatic expiration setting only makes sense once Expiration Policies are defined.
After the workshop
CO Metadata
Some general information will help to identify your CO.
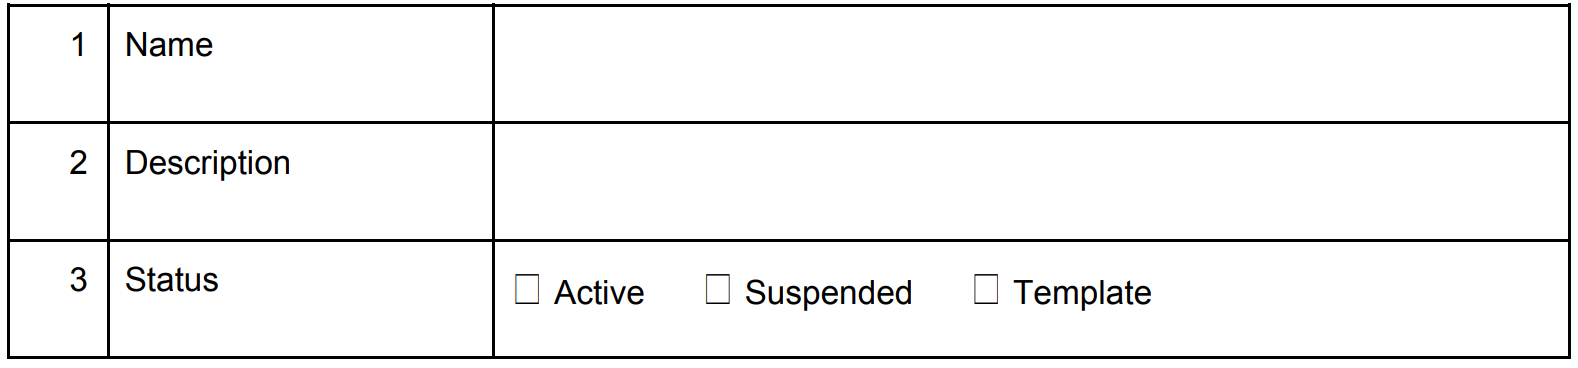
- Name - the name of your CO. When considering a name, think about the individuals that will be included within the CO to ensure that the name is inclusive of them.
- Description - a description for your CO. This description can be helpful for individuals that may be a member of several different COs, and provides an opportunity to include information that you do not want to include in your CO name.
- Status - There are three choices for the CO Status:
- Active - you will select this one. Your CO will be immediately active upon its creation.
- Suspended - Useful if you do not want your CO to be active.
- Template - Useful if you want to create several COs based on the configuration from this one.
Features
There are several features that can be enabled. The default values will be sufficient for most needs.

- Automatic expiration (default: enabled) - In the last lesson we learned that CO Person objects have validity date. The status of the CO Person can be set to expired when the validity date range has passed. Here you can disable this feature of automatic expirations.
- Organizational Identity Source sync (default: enabled) - As you know from our last lesson, the cached Organizational Identity Source Record can be automatically synced to its source according to its defined schedule. Here you can disable this automatic processing.
- Normalizations (default: enabled) - COmanage supports the concept of data normalization. For example, upon entering the text " los angeles " into a field, normalization could correct that to “Los Angeles”. Here you can disable this automatic processing.
- NSF Demographics (default: disabled) - COmanage supports the collection of NSF Demographic Information. Here you can enable this collection.
Validity Timeframes
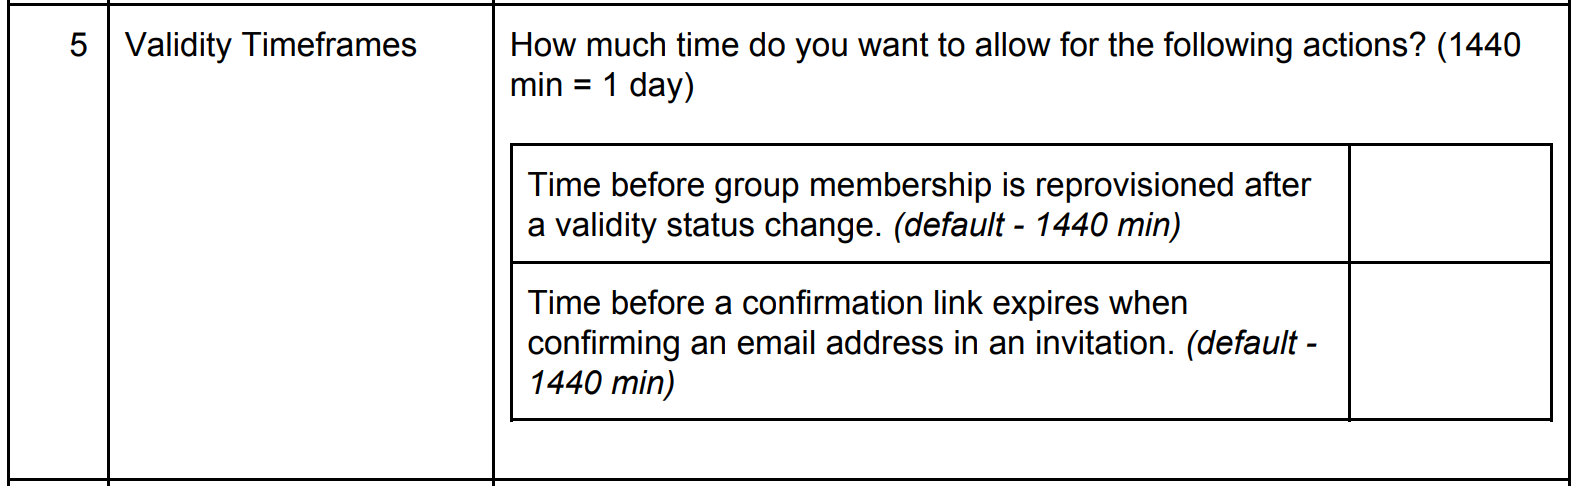
- Re-provisioning (default: 1 day (1440 min)) - COmanage can enable information exchange to external systems through provisioning. If the validity status of the CO Person changes, you likely will want provisioning to change as well. This setting allows you to set a delay before this action occurs to provide flexibility to correct inaccurate status changes.
- Email confirmation (default: 1 day (1440 min)) - Email addresses can be confirmed through COmanage. This security setting allows you to automatically expire the confirmation link after a set period of time.
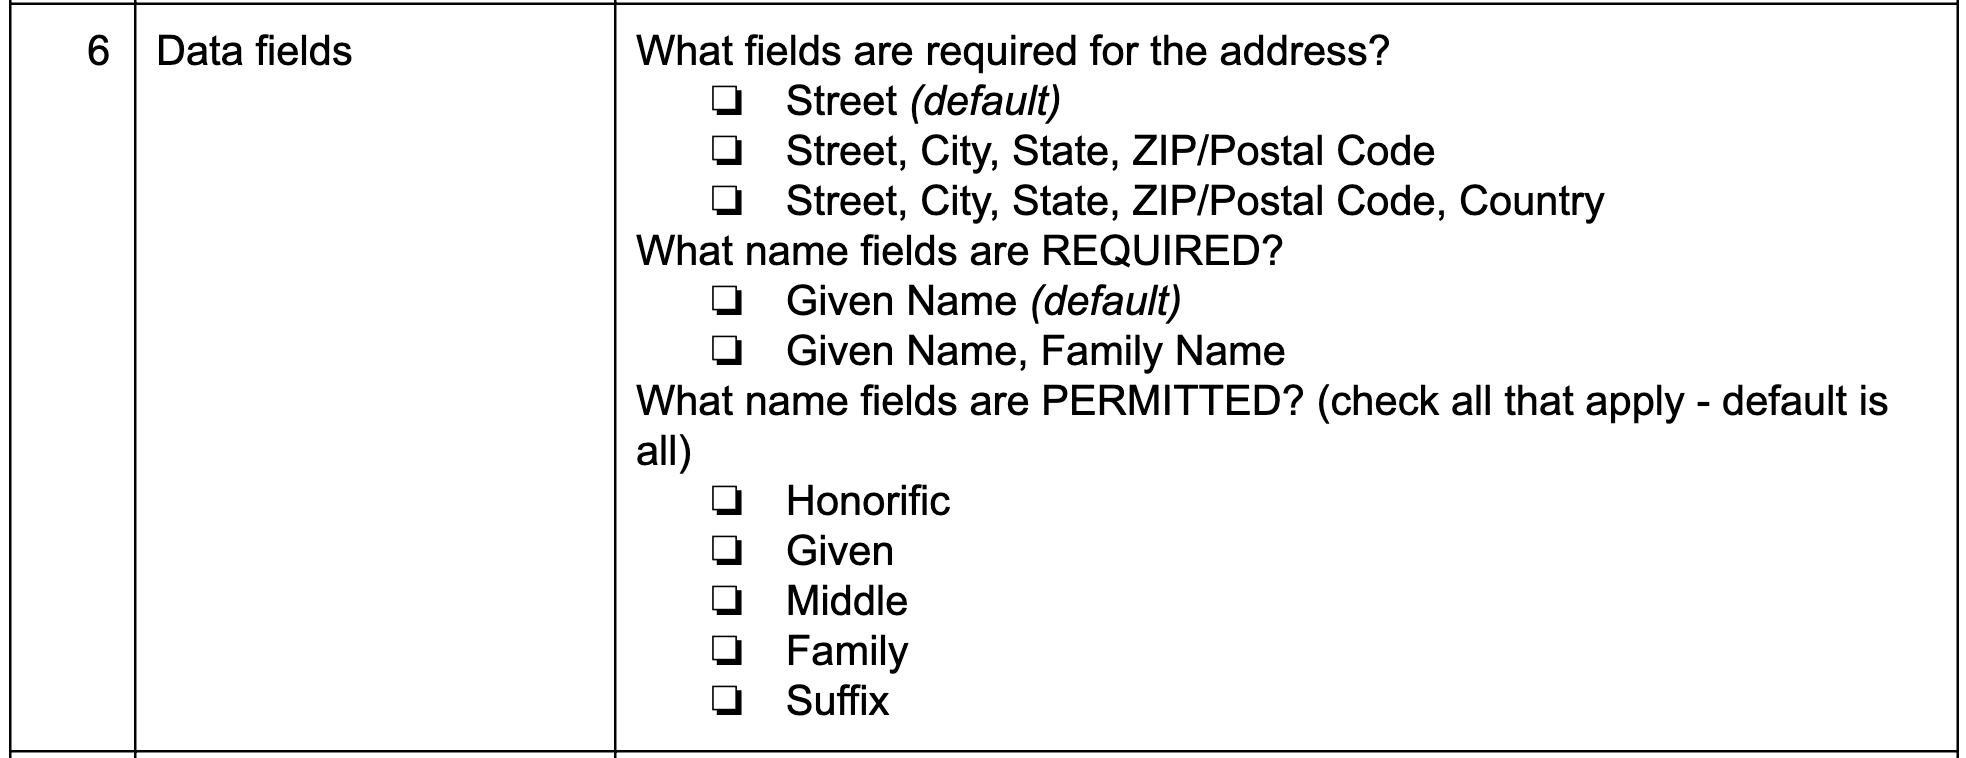
Data fields
In this section, you can set the required fields for physical addresses and names. You can also set what name fields are permitted.
Use rules
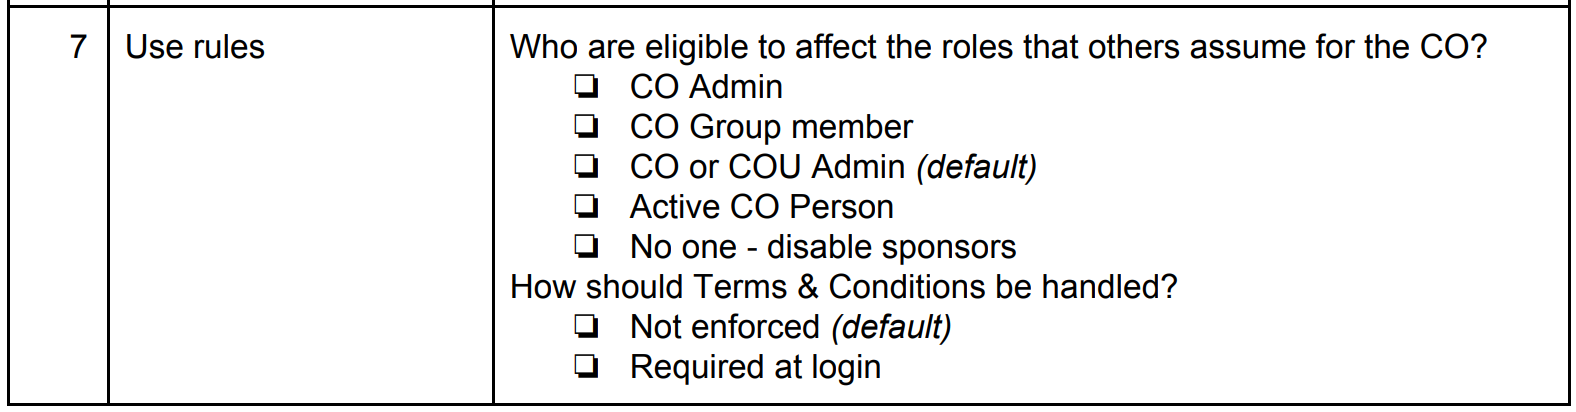
- Sponsor Eligibility Mode (default: CO or COU Admin) - We have not yet talked about sponsorship or many of these roles. This setting determines who is eligible to sponsor others. < LDP: this isn’t enough information to explain what sponsors are – definition requested in slack. >
- Terms & Conditions (default: not enforced) - COmanage can require users to accept terms & conditions when they login. You can use this setting to turn on this feature.
Hands on - Create a CO
Sign into COmanage

-
Using the credentials you specified as part of the COmanage setup, sign into your installed version of COmanage.
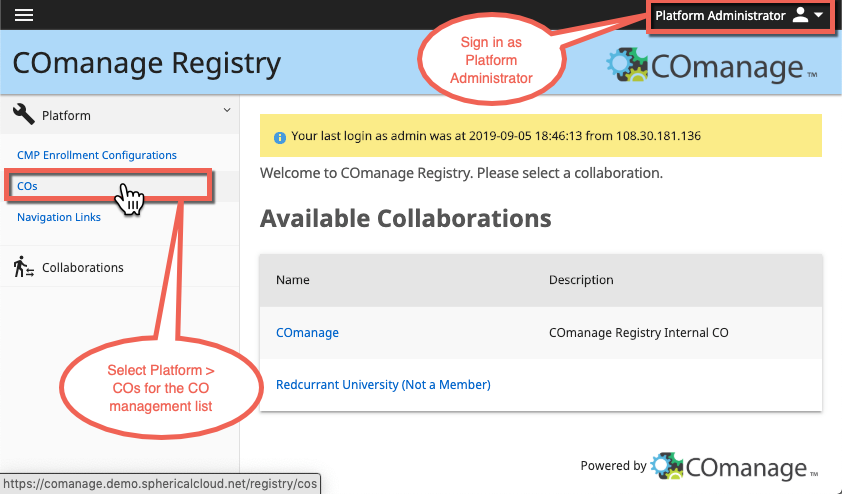
https://registryN.comanage.incommon.trainingThese credentials have Platform Administrator privileges which enable you to create COs . Once you sign in you will see a list of available collaborations.
Create the CO
REQUIRED ROLE: CMP Administrator
-
From the menu, select Platform > COs to display the CO Management Overview List.
-
Click the “Add CO” link above the table on the right side to add a new
CO⚙️.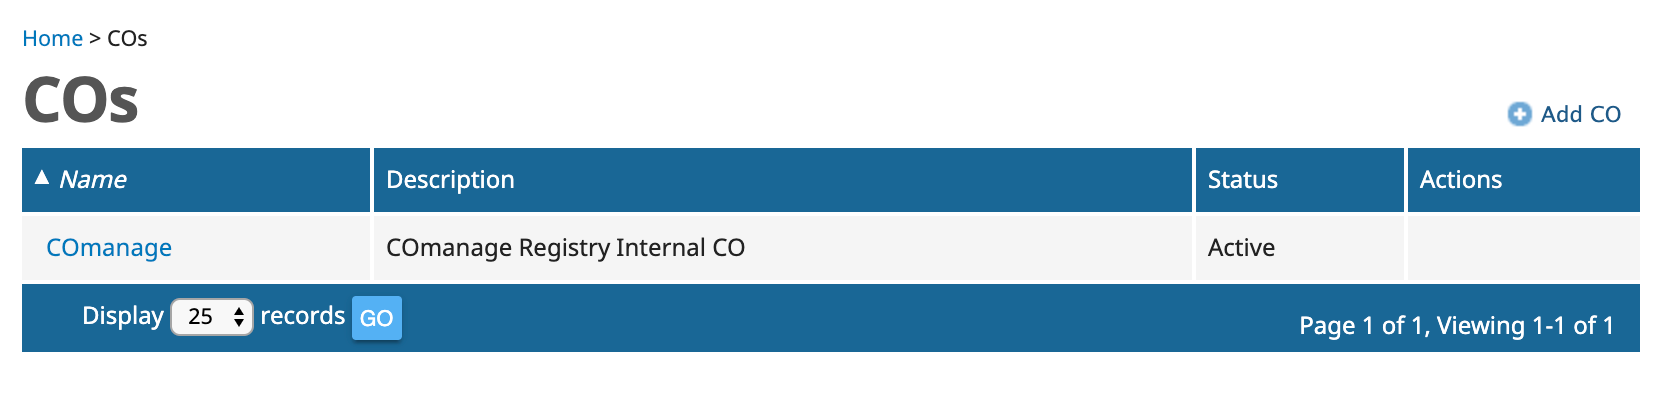
-
Fill in the Metadata fields for the CO as described above:
a. The name of your CO. This name will be displayed on lists and elsewhere. It is a good idea for this name to be descriptive, but relatively short.
b. Description. Write a short description of your CO. This description will be helpful for those who may not be familiar with your CO’s name.
c. Status. There are three choices for the status:
- Active - you will select this one. Your CO will be immediately active upon its creation. SELECT THIS VALUE
- Suspended - Useful if you do not want your CO to be active.
- Template - Useful if you want to create several COs based on the configuration from this one.
-
Click the ADD button to save your new
CO⚙️.
Configure your CO Settings
REQUIRED ROLE: CMP Administrator -OR- CO Administrator
-
Navigate back to the Collaborations List by selecting “Collaborations” from the menu.
-
From the Collaborations list page, click on the name of the Collaboration that you just created.
-
In the CO menu, click on the “Configuration” link to see the list of customizations that you can make. Click on the first link, CO Settings to adjust the settings.
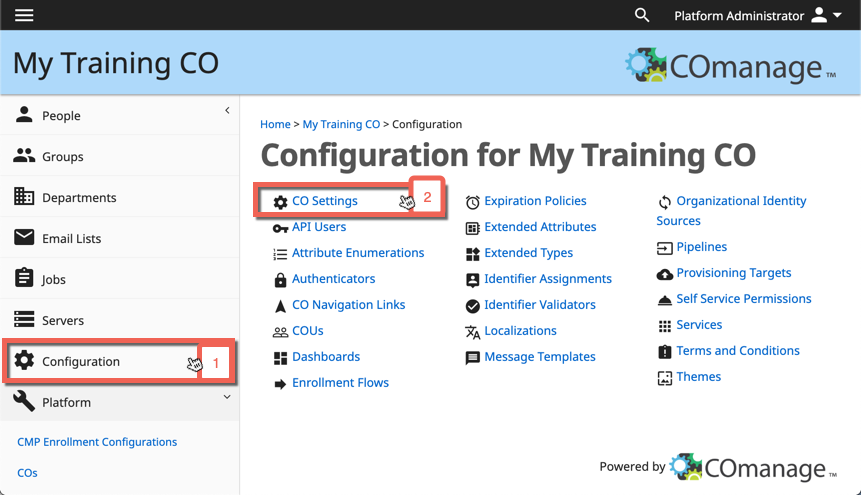
-
Configure the CO with the Features, Validity Timeframes, Data Fields, and Use Rules described above.
-
Click the
SAVEbutton to save your work.
Establish a CO Administrator
Now that you have created a CO, you should set up at least one person as its administrator. For this example, you do not yet have any CO Persons that you can assign to this role. Instead, you will manually create records to create a CO Person and set up yourself as that administrator.
-
Ensure that you are signed in and are looking at the CO that you created.
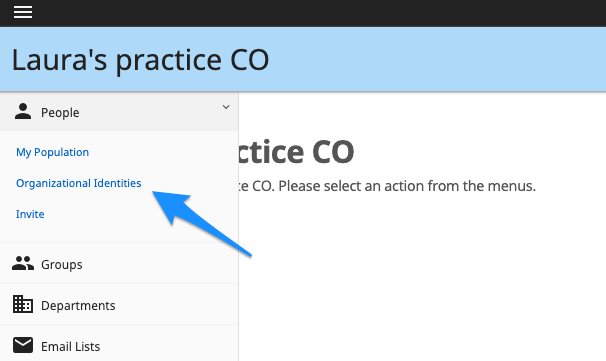
-
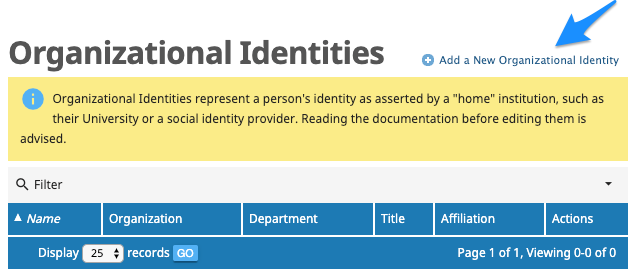
Navigate to the Organizational Identity List using the menu on the left by clicking People > Organizational Identities
-
Click on the Add a New Organizational Identity link to open a form to create a new Org Identity . NOTE: generally you will not be performing this function manually, so we will include the minimum attributes and information here.
-
We will be adding the Org Identity for the person that you selected during you pre-work for the CO Administrator . If you do not have this information, you can select one of the people from the User Accounts for Training document pinned in the workshop Slack. You have the following values (although, you are welcome to fill out additional fields if desired):
- Given Name (givenName)
- Family Name (sn)
When you are finished, click the ADD button to save the new Organizational Identity. This action will bring you to the edit form for the
Org Identity. -
You will need an email address associated with this
Org Identityto send an invitation to this person to sign in. Add the email address for the person by clicking the Add button in the Email addresses section. Fill in the form that is presented with the email address for the individual (the mailinator address), and click the ADD button to add the email address.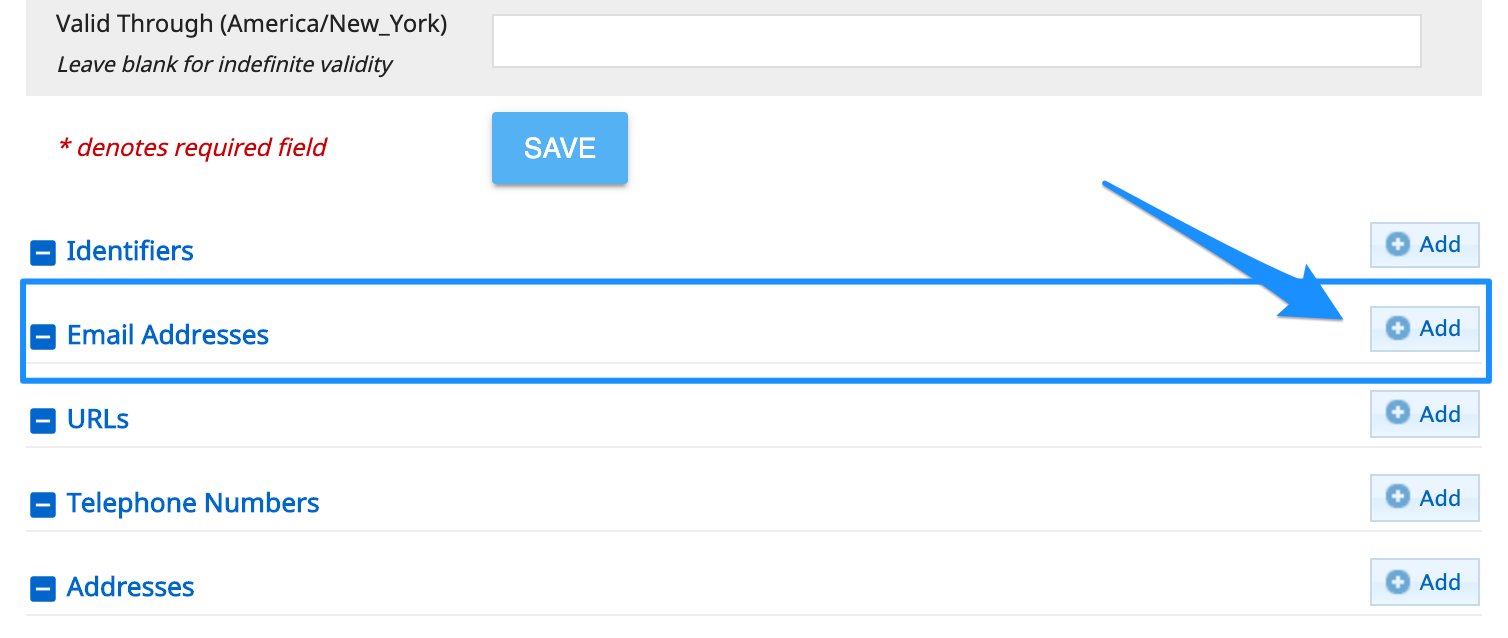
-
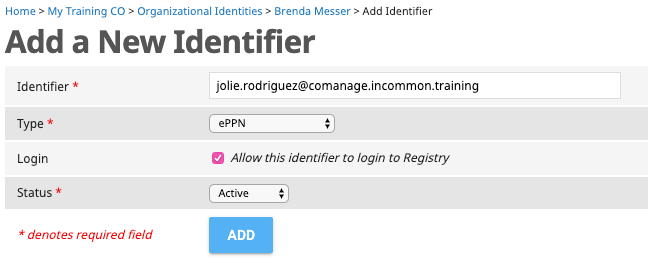
You also will need an identifier for this person that will match the account that they will use to sign in. Click the Add button in the Identifiers section. Fill in the form that is presented with the ePPN (including the @comanage.incommon.training scope). Be sure that
- The Type is “ePPN”
- The Login is checked, indicating that this is the identifier that will be used for the person to sign in
- The Status is “Active”
-
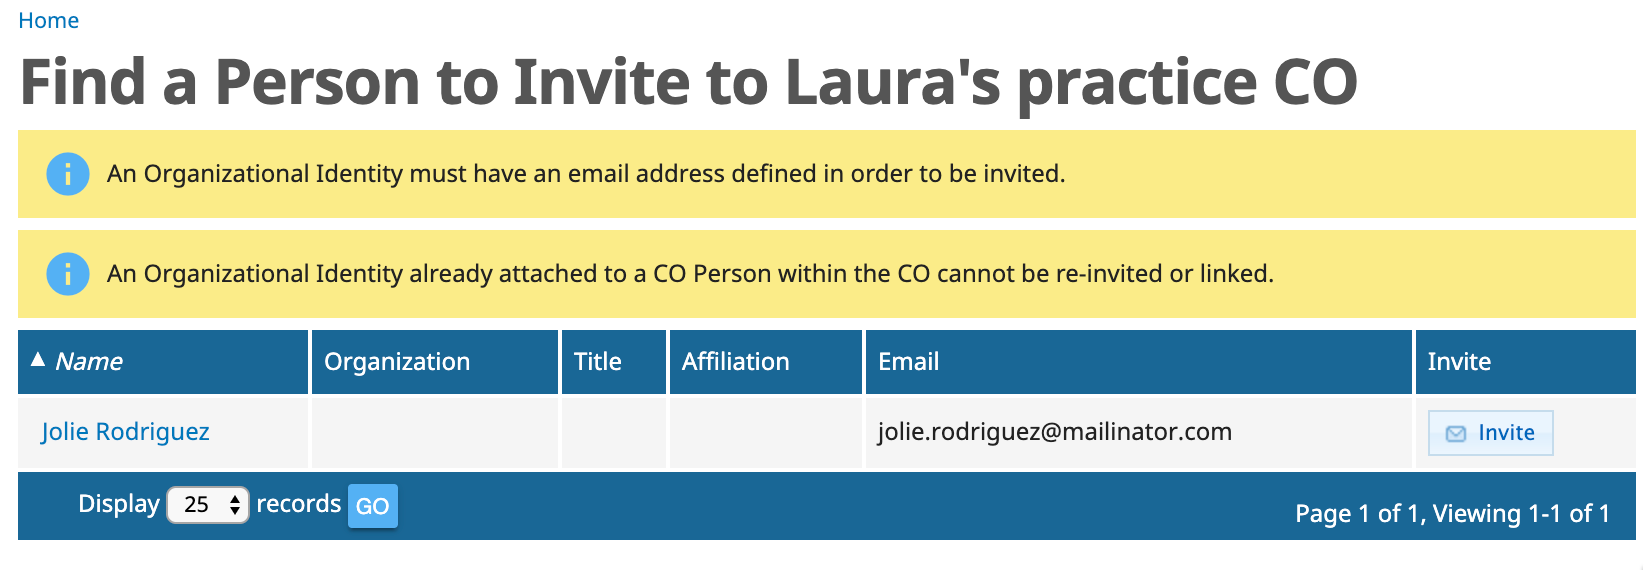
Now that you have an Org Identity with an email address, you can invite this person (you!) to be a member of your CO . On the menu on the left, select People > Invite to start the process. This action will bring you to a list of Org Identities that both have an email address, and has not yet a part of the CO or been invited to join. You will see the Org Identity that you created on this list.
-
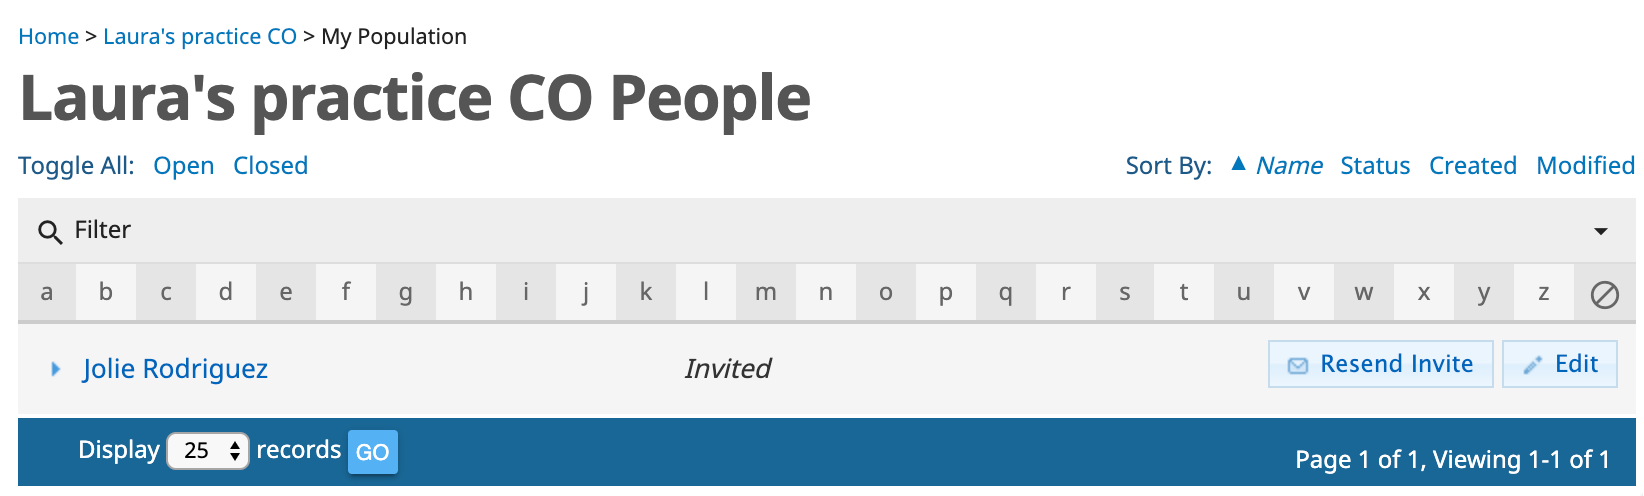
Click the Invite button, review the form that appears as a result, and then click the “SEND INVITE” button. This action will send an invitation email to the address stored, and will add a CO Person attached to the Org Identity to the CO . This means that this new CO Person will appear in the population list for the CO. (The population list appears once the invitation is sent.)
-
Before this person’s invitation will work, enabling the person to sign in, you will need to make a few more changes. (Don’t worry too much about these steps at the moment. We will go over them in depth over the next several lessons.)
- Add a role for the person. From the My Population List (displayed as a result of the previous step), click on the Edit button to open the edit form. In the Role Attributes section, click the Add button to add a role. Don’t make any changes to the form that is displayed - just click the ADD button. Click the SAVE button to return to the original form.

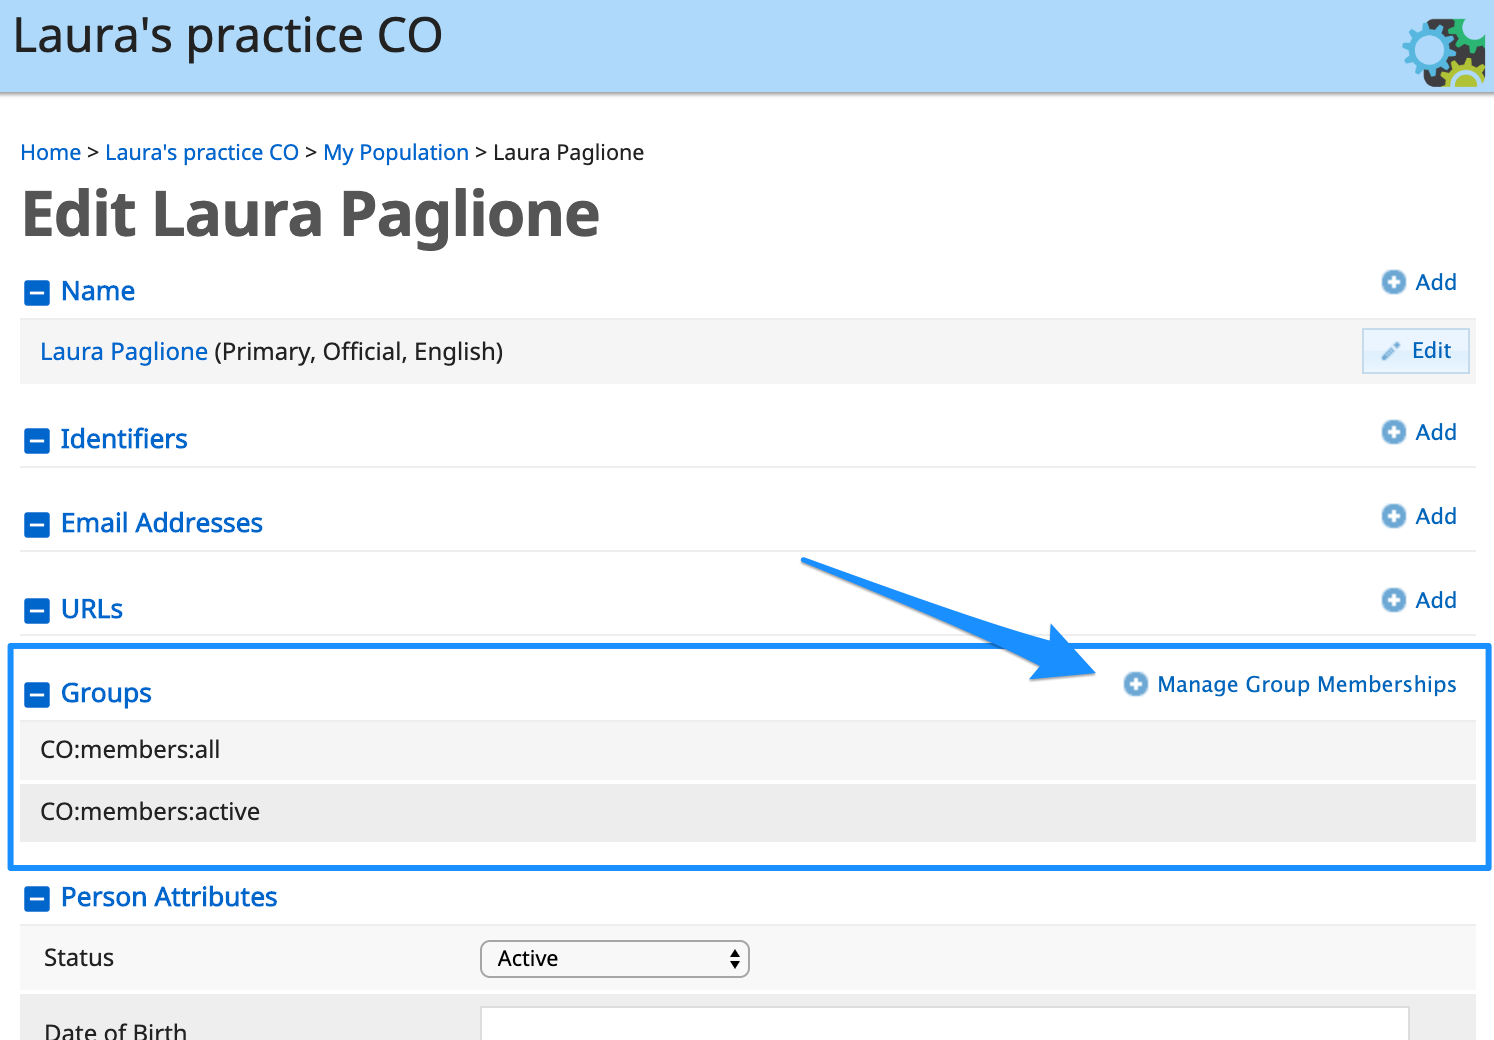
- Add the person to the CO:admins group. In the Groups section, click the Manage Group Memberships link. for the CO:admins group, check the Member checkbox in the Actions column. Click the SAVE button at the bottom of the list to save this action. Navigate back to the CO Person to check that this person is now a part of the administrators group for the CO .
-
Look for the invitation at Mailinator. In a new browser window, navigate to https://www.mailinator.com/. In the box at the top of the screen, type the email address of the person that you just invited to see that person’s public inbox. (note: this is just for demonstration purposes - of course, you wouldn’t use Mailinator email addresses when really inviting people.) When you click the Go! button, you will navigate to the inbox.

-
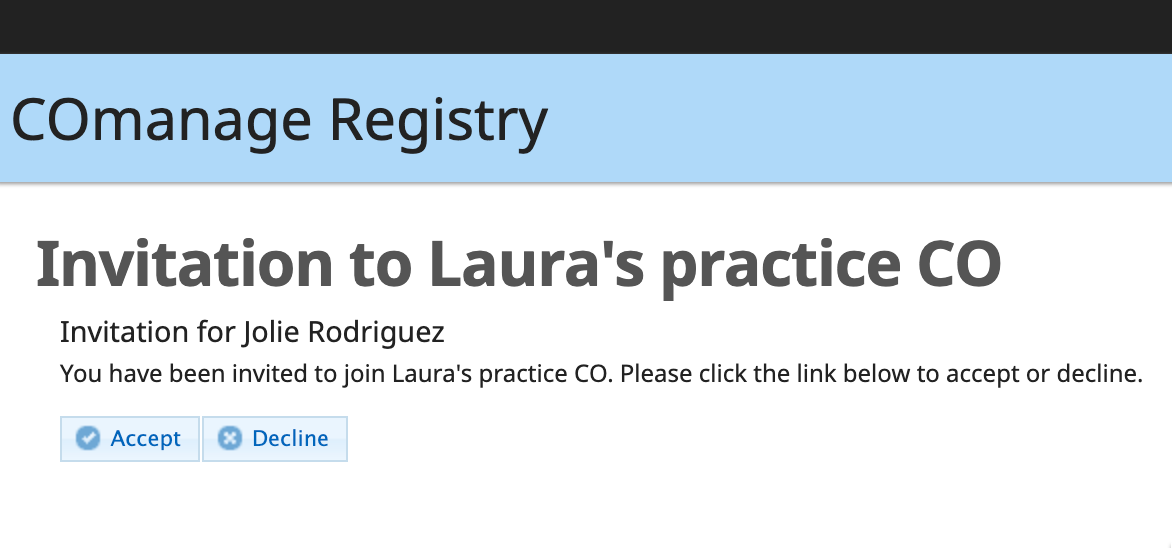
Open the invitation email. Copy the link address (mailinator will not provide functioning links, so you must copy the text.).
-
Open a PRIVATE or INCOGNITO browser window and paste the URL in the address field to view the result of the invitation. Click on the Accept button to accept the invitation.
-
From this same PRIVATE or INCOGNITO browser window, log in as the CO Administrator that you just added. You will need to use this user’s UID and the training password.
CONGRATULATIONS!! You have just created and configured your first CO.
[25 min]
Terminology & resources
See resources and definitions for COmanage-specific terminology in this lesson.