Introduction to Elastic Cloud Compute (EC2)
Contents
Introduction to Elastic Cloud Compute (EC2)#
Overview
Teaching: 45 mins
Exercises: 10 mins
Questions:
What is an EC2 instance?
When would I use an EC2 instance?
How do I launch an EC2 instance?
Objectives:
Understand the concept of virtual servers.
Understand what an Elastic Cloud Compute (EC2) instance is.
Understand how to launch an EC2 instance.
Recall that the two fundamental components of cloud computing is compute and storage. On AWS, a “virtual server” or “virtual computer” is known as an Elastic Cloud Compute (EC2) instance; sometimes it’s called “EC2”, sometimes it’s called an “instance” to denote that the ability to build and terminate this server instantaneously, but they all mean the same thing. An EC2 instance is no different from a server that sits under your desk, or your local departmental cluster, or even your local HPC cluster. You even boot up an EC2 instance through the web console, install software and then shut down your instance just like you would a real computer, except that Amazon takes care of the physical machinery while you are in charge of process of creating the computer. In some sense, you can think of utilizing an EC2 instance as renting a server or computer from Amazon!
In cloud jargon, the term elasticity denotes the ability to quickly expand or decrease computer processing, memory, and storage resources to meet changing demands. In that way, you can expand the size of your CPU, RAM and disk size on your EC2 instance almost instantenously. Since EC2 forms the backbone of most of AWS’s core infrastructure, it is an important part of your cloud journey.
Let’s walk through some of the steps on getting an EC2 instance up and running.
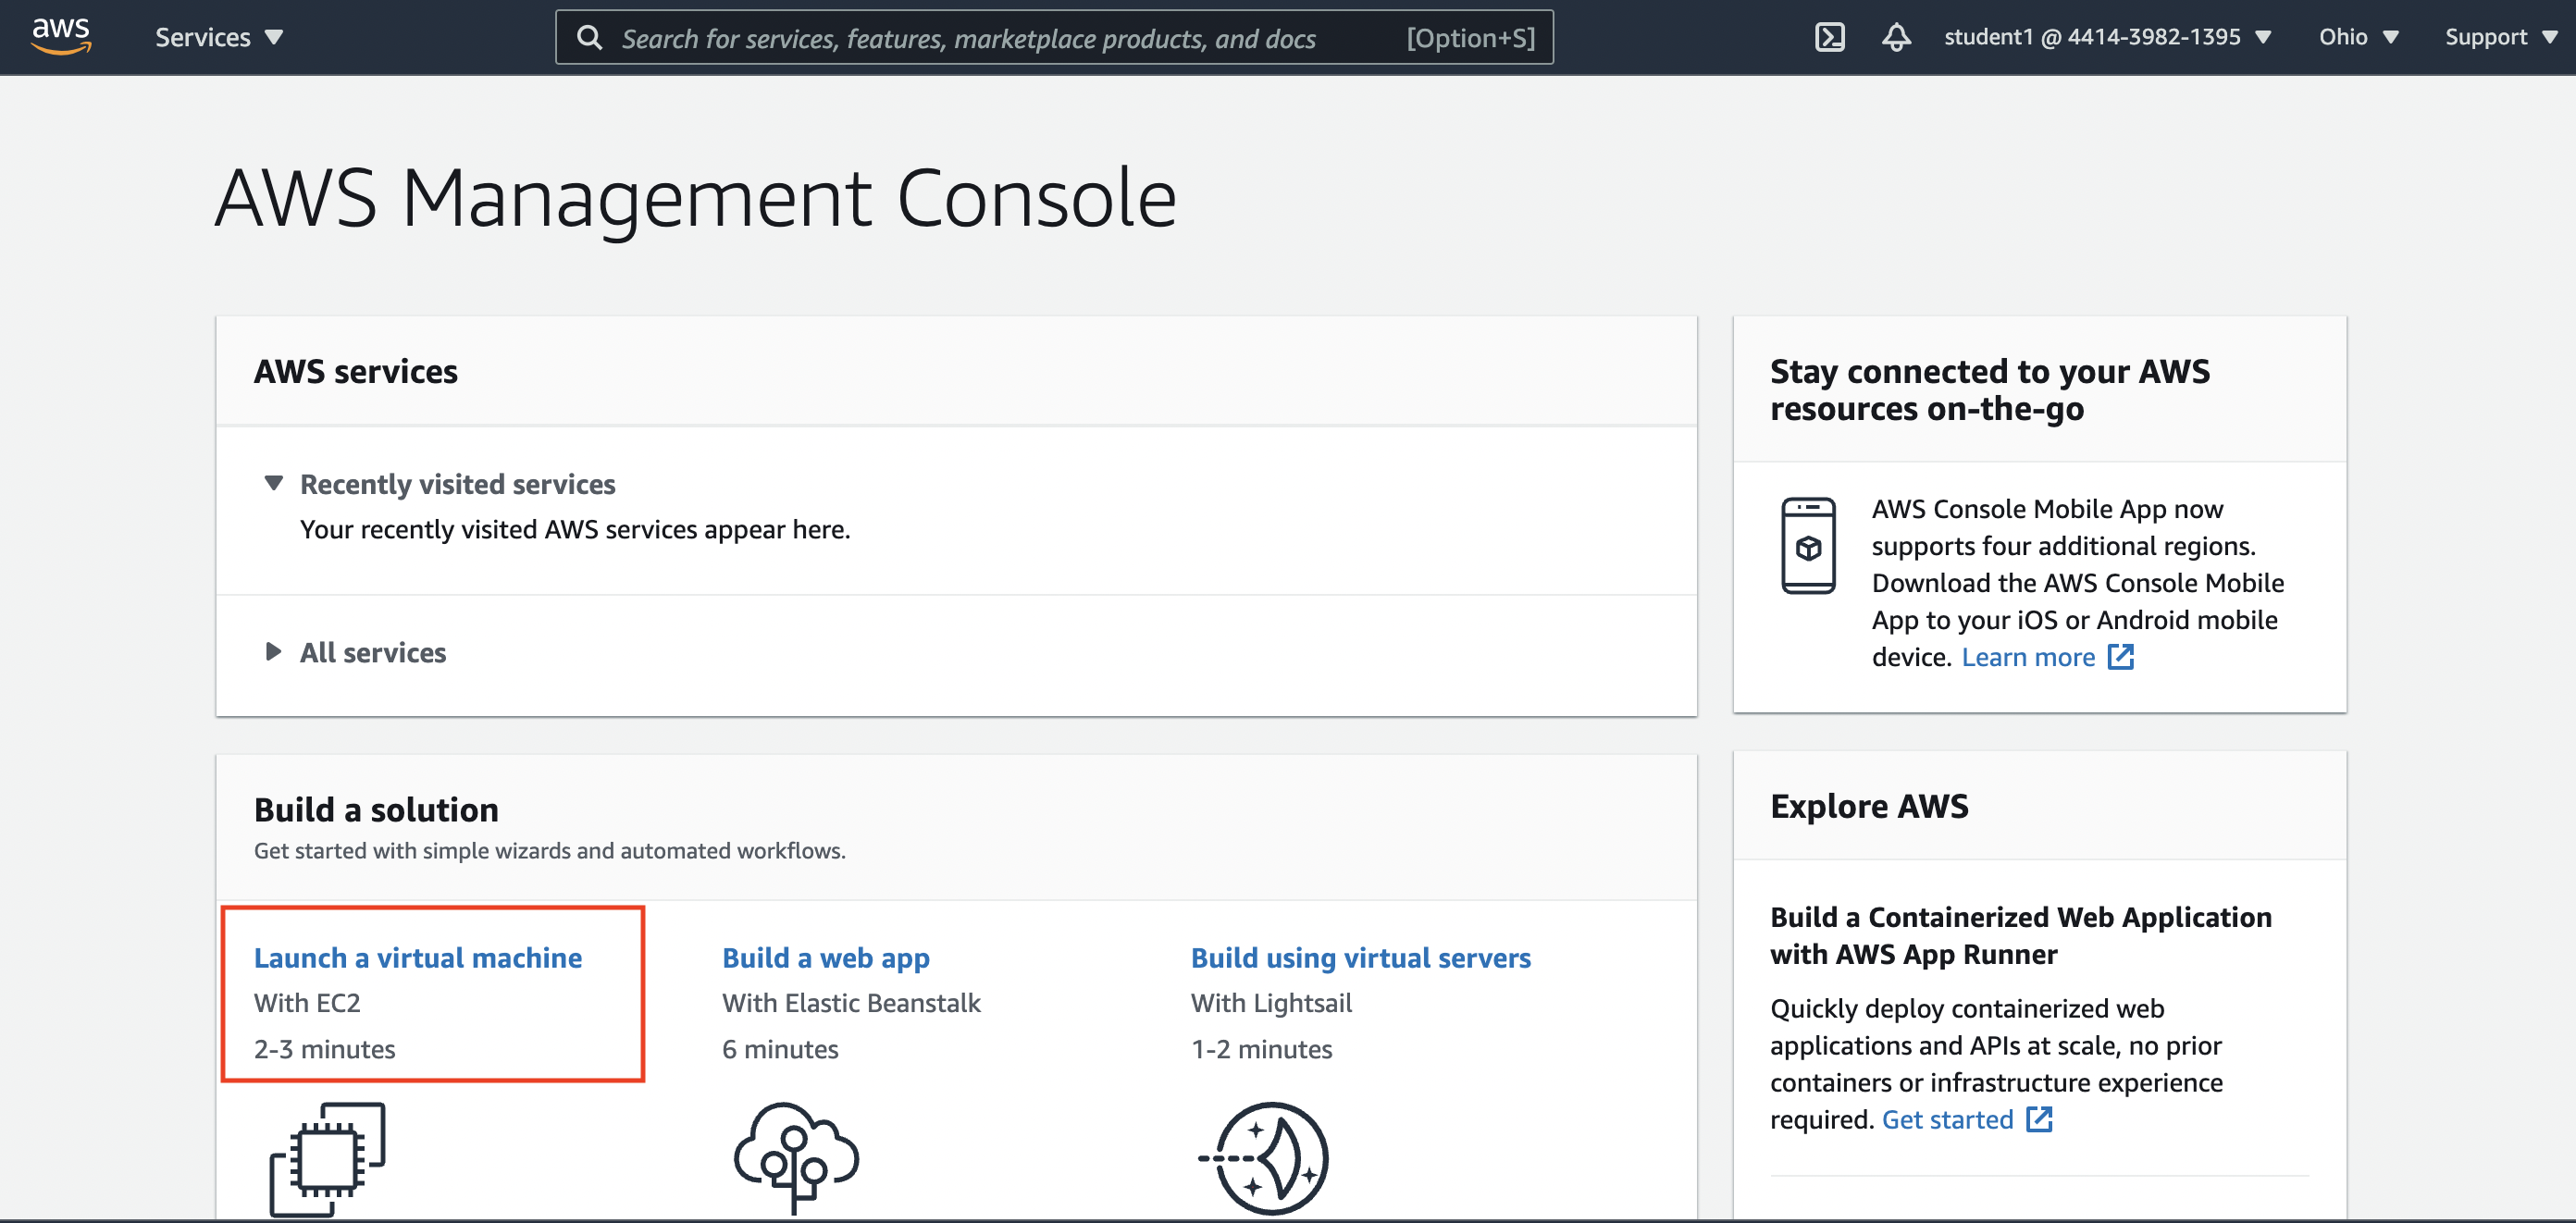
We begin with the AWS console again. Under the “Build a Solution” panel, select Launch a Virtual Machine
This will then lead you through a series of steps to get a Free Tier EC2 instance up and running.
Note
AWS Free Tier refers to several of the services that AWS offers to help users gain more hands on experience on the AWS platform without being charged. Click here for more info about the AWS Free Tier [external link] .
There are 7 steps to walk through to create a new EC2 instance; we will go through each in detail:
Select an AMI
Choose Instance Type
Configure Instance
Add Storage
Add Tags
Configure Security Group
Review/Launch
1. Select an AMI#
An Amazon Machine Image (AMI) is a template that Amazon uses to describe the operating system, disk type and all the software configuration that is needed to make sure a computer runs smoothly. Imagine that you are purchasing a new laptop; fresh out of the box, the laptop is pre-configured with an operating system (e.g. Windows, Mac OS, Ubuntu etc.), configuration files that tells the laptop what peripherals are attached, and pre-installed software like Adobe PDF reader. An AMI contains all this information so that your EC2 instance runs exactly like it would a new laptop out of the box! There is much more to learn about AMIs and how they can used for collaboration and data sharing but that is not within the scope of CLASS Essentials.
As you scroll through the AMI list (Figure 2) you will notice that the list contains offerings from various vendors (e.g. Amazon, RedHat, Windows, etc.). We will be choosing the Ubuntu operating system for flexibility and versatility (can be used outside of the AWS ecosystem).
To list all the Free Tier AMIs, check the box on the right that says Free tier only.
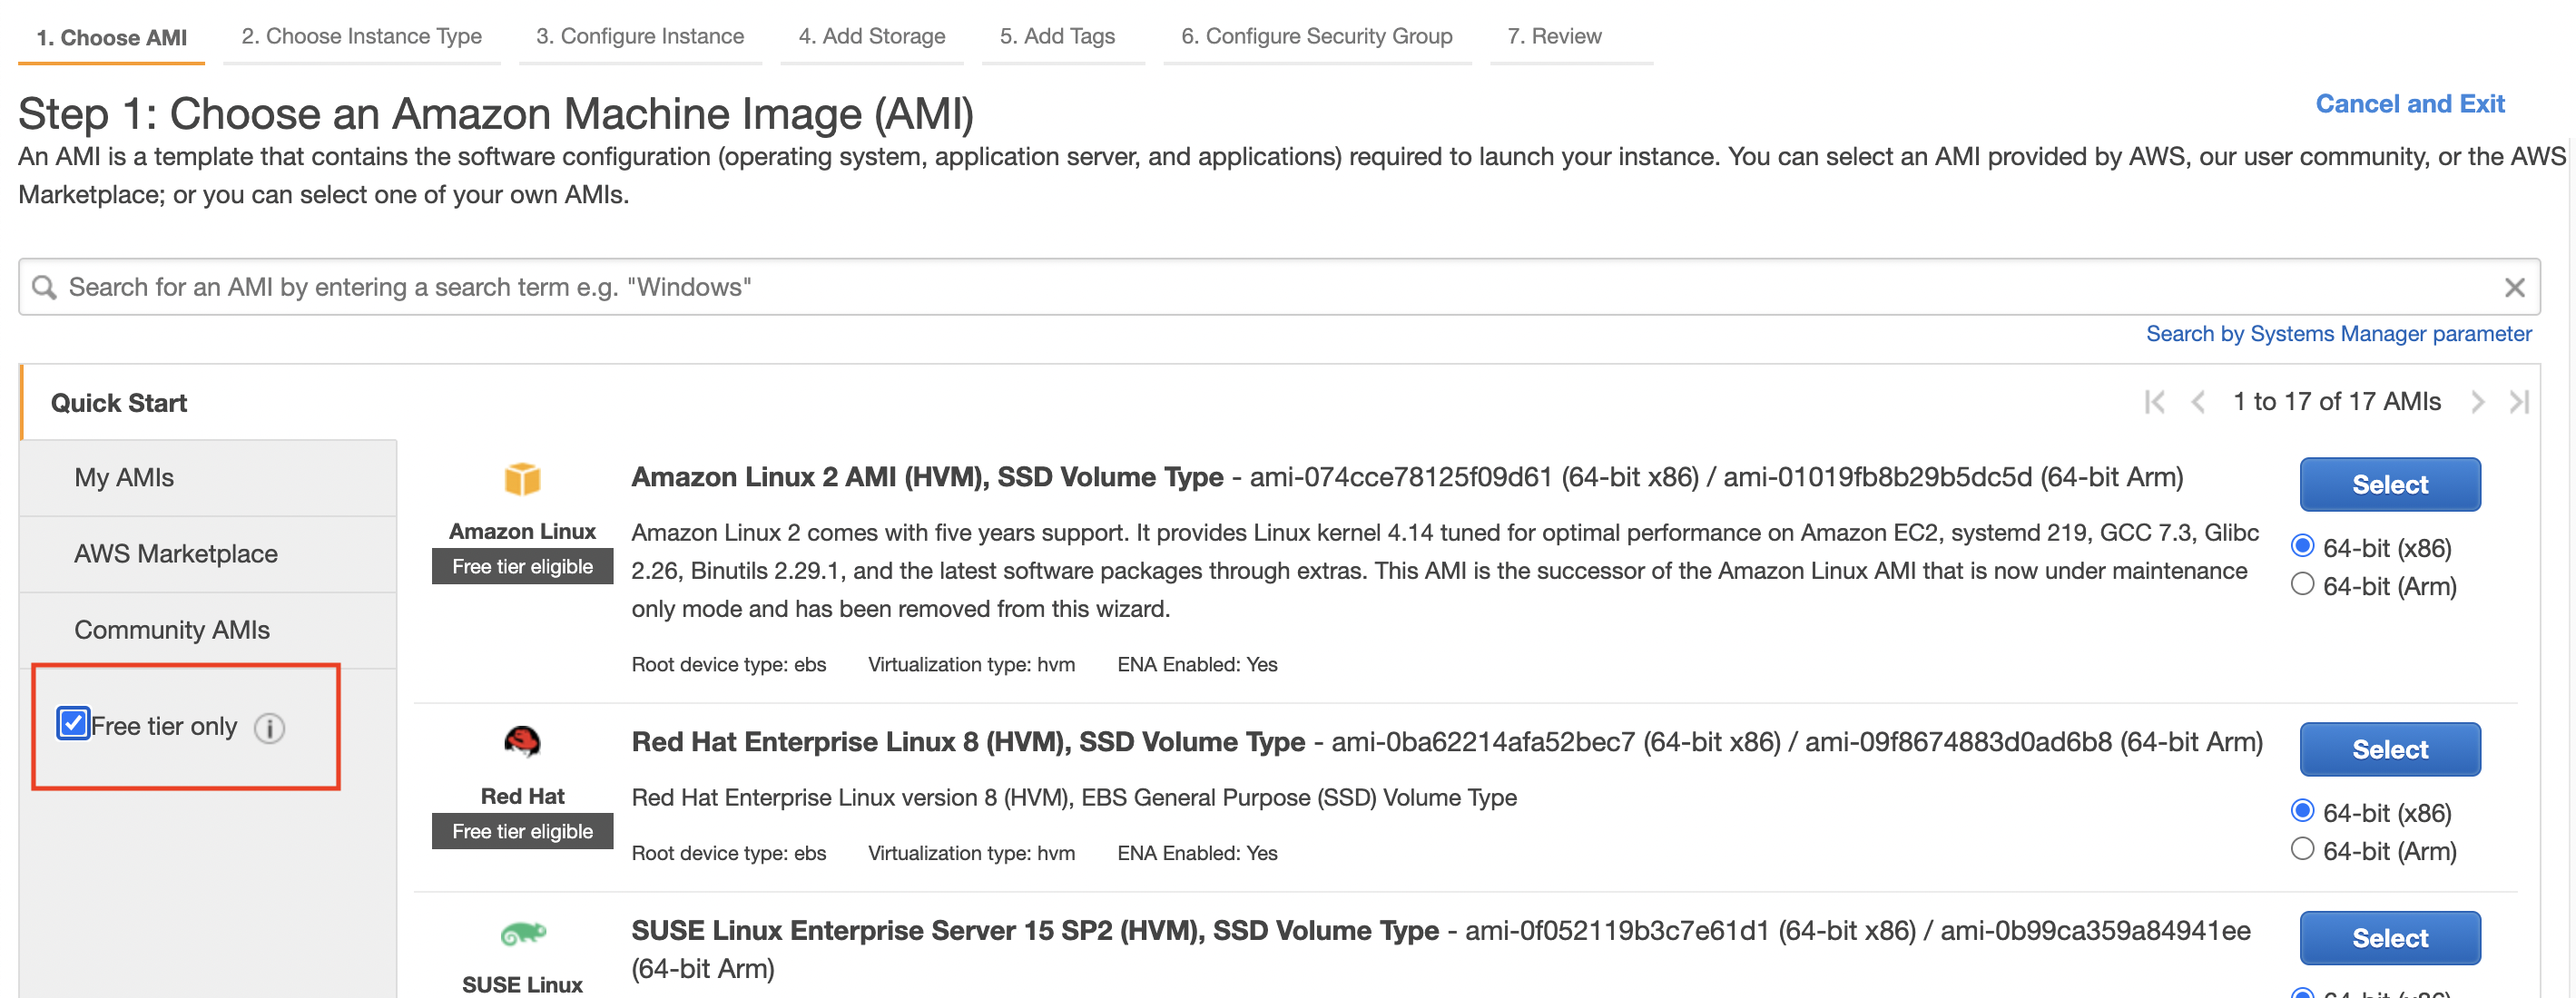
Scroll to Ubuntu Server 20.04 LTS(HVM), SSD Volume Type (Figure 3). Select 64-bit(x86).

Step 2: Choose an Instance Type#
Choosing an instance type is choosing the hardware for your computing system: you get to pick the number of CPUs and memory size for your instance.
Instance types are group by families and denotes whether, for example, an instance is optimized for batch processing (compute-optimized, C-family), optimized for databases (memory-optimized, R-family) or has accelerated hardware (GPUs) for AI or Machine Learning pipelines.
When you choose an Instance Type (Figure 3), the screen show additional information about the selected instance type including the number of CPUs, the memory size, the type of storage and information about networking.
In the Instance Storage (GB) column, you will notice a term called EBS. EBS is the acronym for Elastic Block Storage and is analogous to the hard disk or boot drive on your personal computer or laptop. More details about EBS and different kinds of disk storage on EC2 instances are beyond the scope of CLASS Essentials.
Note
The four most common types of storage you will encounter on AWS are: Elastic Block Storage (EBS), Elastic File Storage (EFS), Simple Storage Service (s3) and s3 Glacier. In the simplest terms, EBS is analogous to a computer hard drive and EFS is analogous to a network file system (NFS) or shared file system. s3 is AWS’s object storage which is discussed here. s3 Glacier is a cost-effective way of storing s3 files that you do not need to access frequently.
Here will will select a t2.micro instance which is Free Tier Eligible but only has 1vCPU and 1 GiB of memory. The cost of running a t2.micro instance is
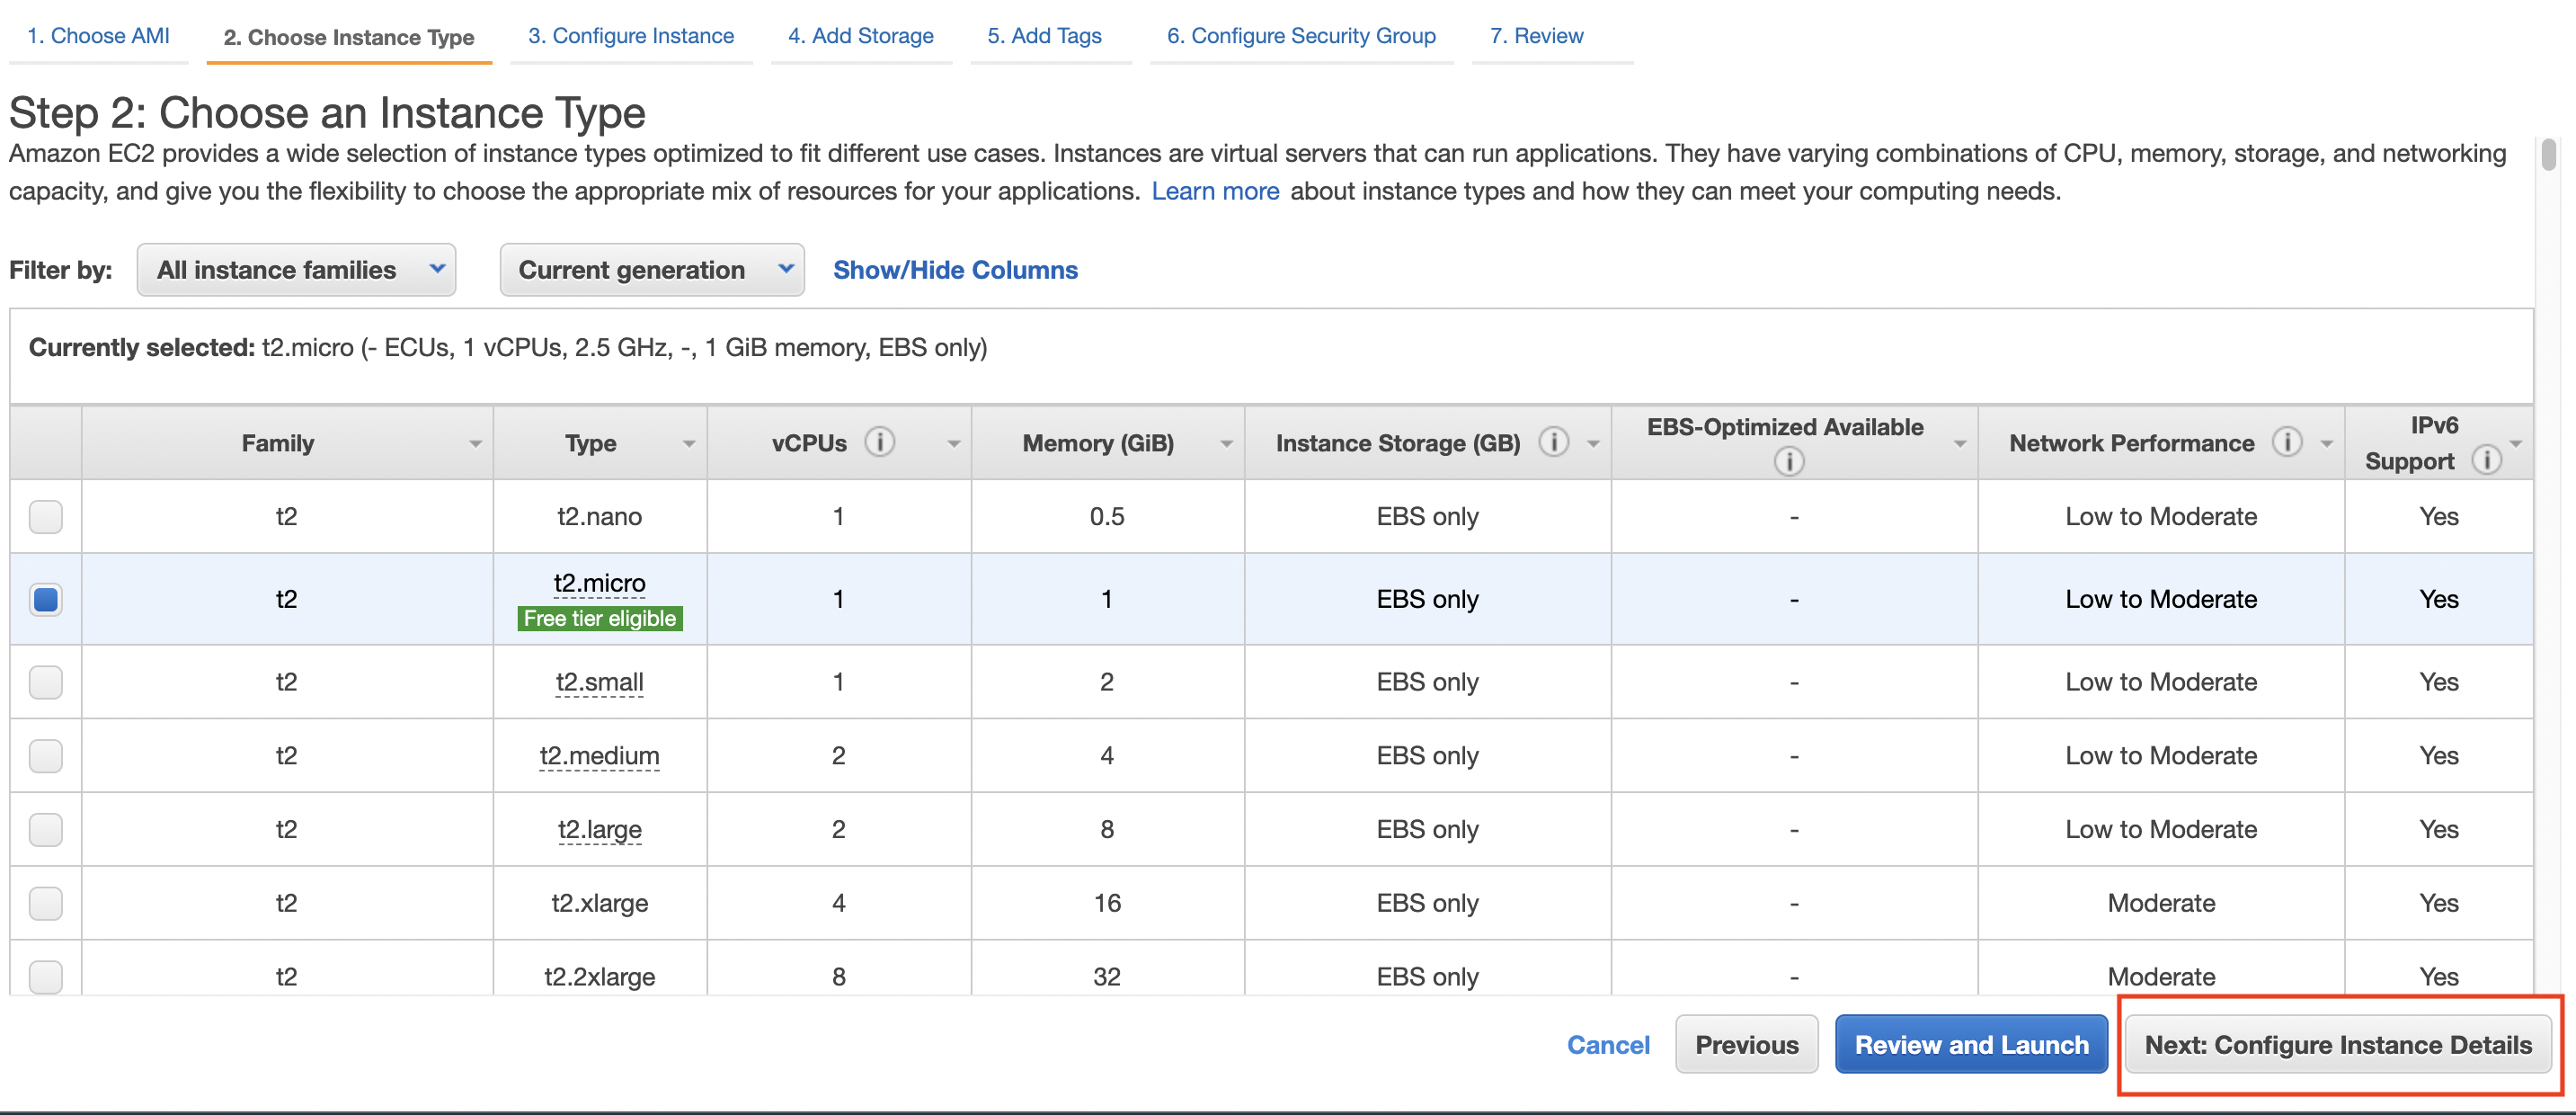
Select Next: Configure Instance Details.
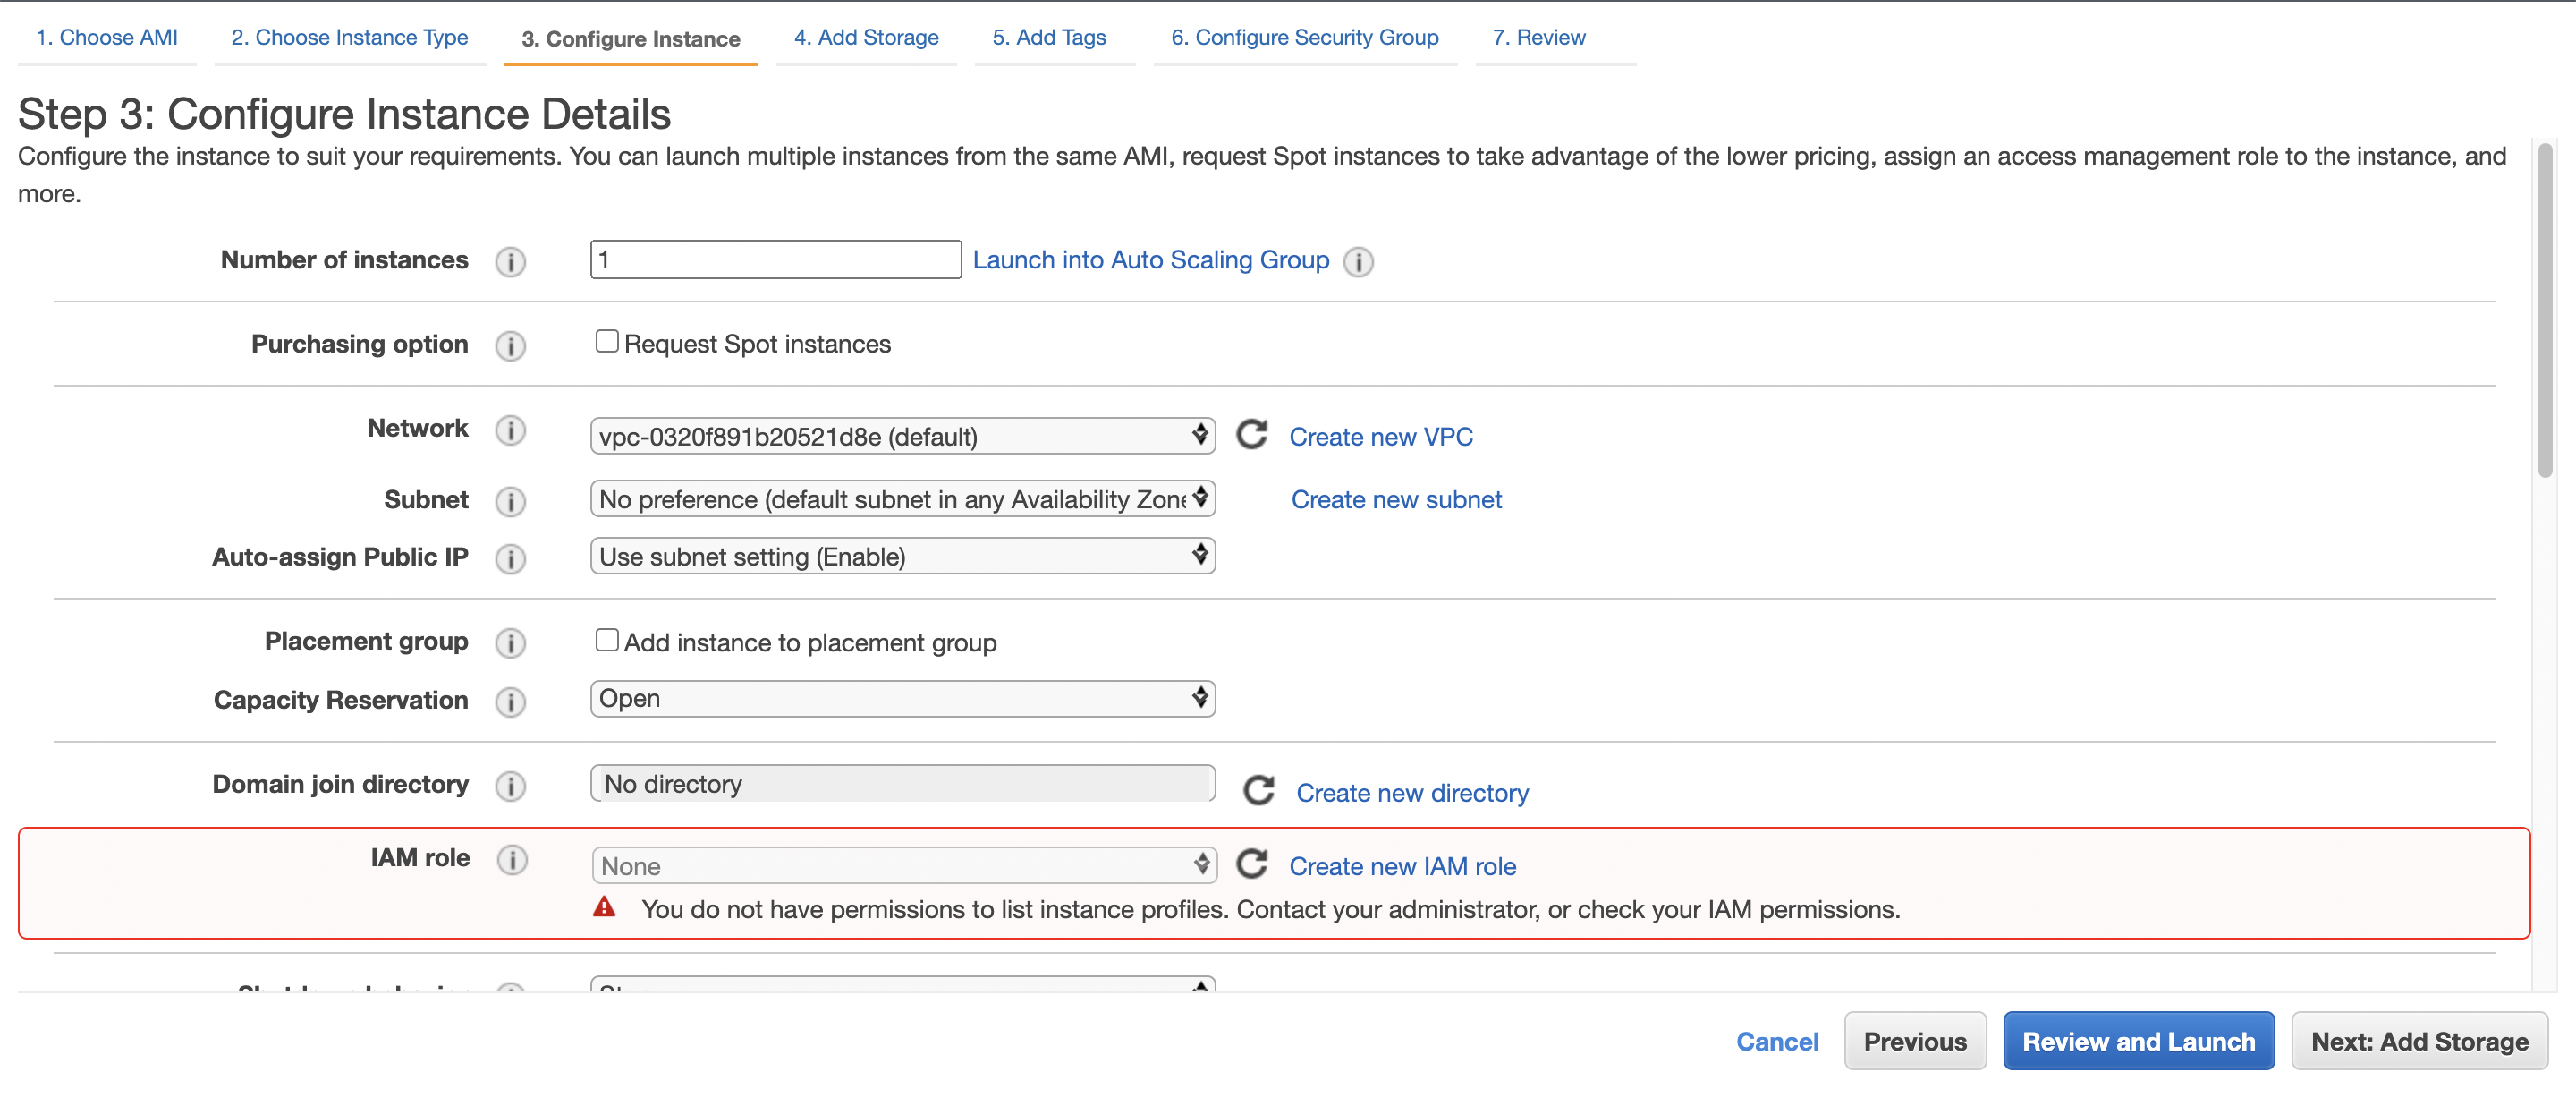
Step 3: Configure Instance Details#
Step 3 in creating an EC2 instance involves a rudimentary understanding of several key AWS and cloud jargon. Here we will leave all the settings as default except one. We will change the IAM role to LabInstanceProfile.
Dlving deeper into some of the terminology is outside of the scope of CLASS Essentials, we go will through some of these terms in brief as we learn how to configure your EC2 instance. You can also click the grey “i” icon in the configuration list for a description. For the most part, we will leave the settings as default.
Exercise
What kind of information is contained in an AMI?
How do Spot Instances help you optimize costs?
Some important terms to note:
Number of instances : This indicates how many instances you want to create at the same time. Here, we will leave the value as ‘1’ but in actuality, you can can have up to 20 instances per region.
Note
Recall that we learned about regions in the previous chapter.
Purchasing Options : Throughout your AWS journey, you will hear the term Spot Instances. Spot instances make use of the servers that go unused in AWS data centers to minimize costs. Recall that AWS has many data centers spread across the globe and not all their servers are utilized at 100% capacity at all times. Amazon uses Spot Instances as a flexible way to profit from extra capacity. Users have access to Spot Instances through a bidding process, sometimes users can save up to 90% off the on-demand compute instance this way!
IAM Role : An IAM role is an identity that you can create in your account that has specific permissions. An IAM role has some similarities to an IAM user. Roles and users are both AWS identities with permissions policies that determine what the identity can and cannot do in AWS.
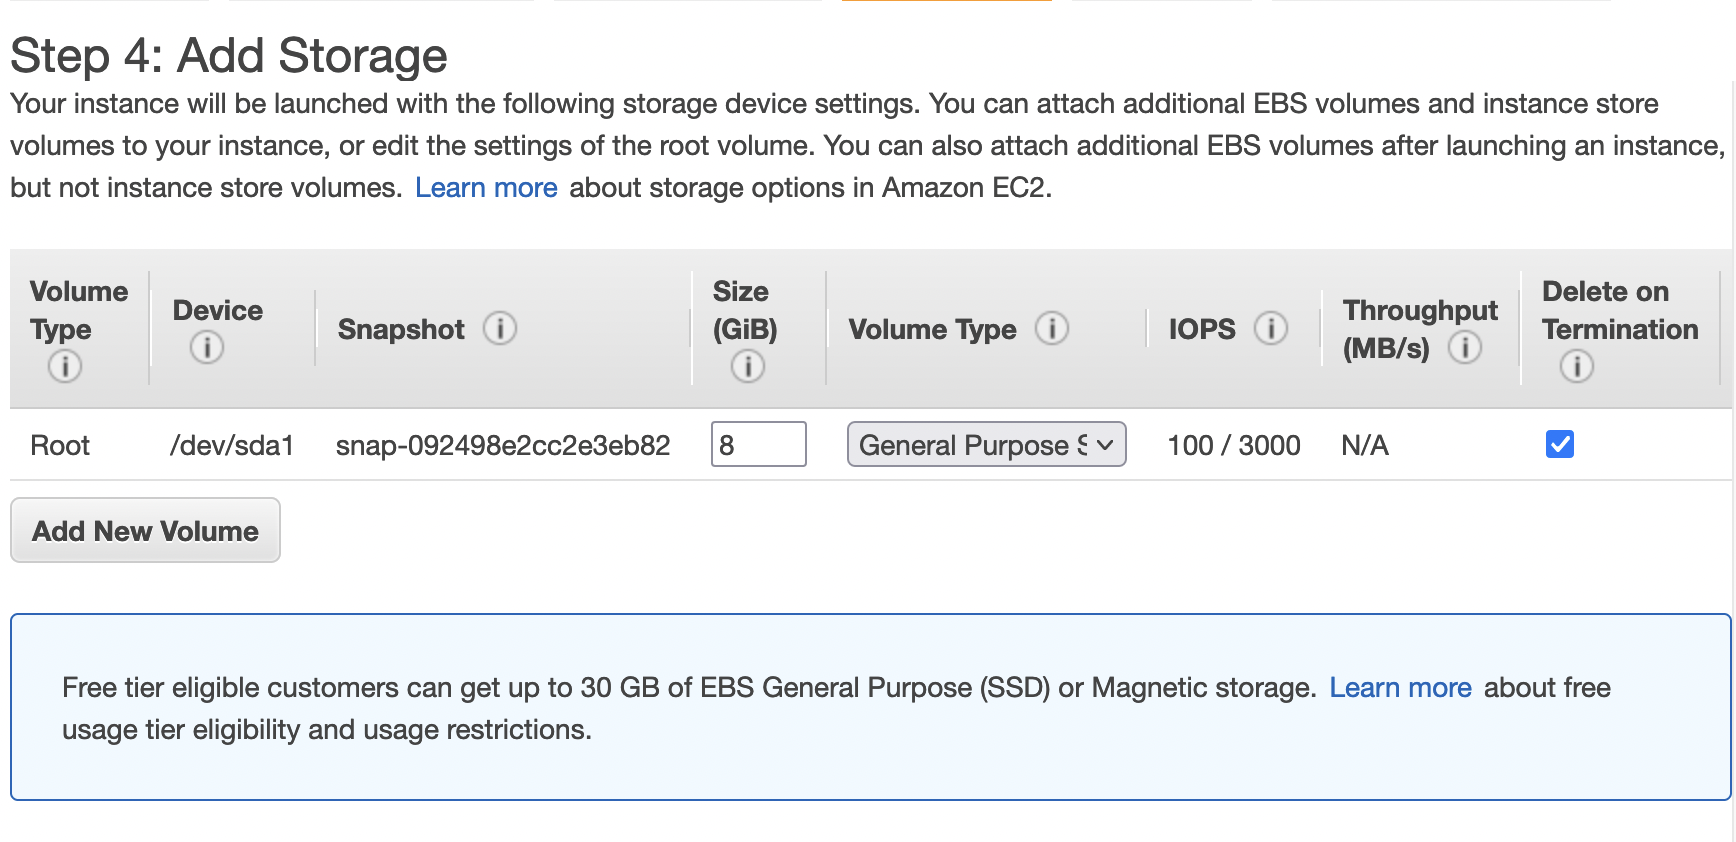
Step 4. Add Storage#
Storage on an EC2 instance is akin to a hard drive. Here we will leave the default settings but it is important to know that a hard drive on an EC2 instance is known as Elastic Block Storage. EBS volumes behave like raw, unformatted block devices. Sometimes an EBS volume is also known as a persistent disk.
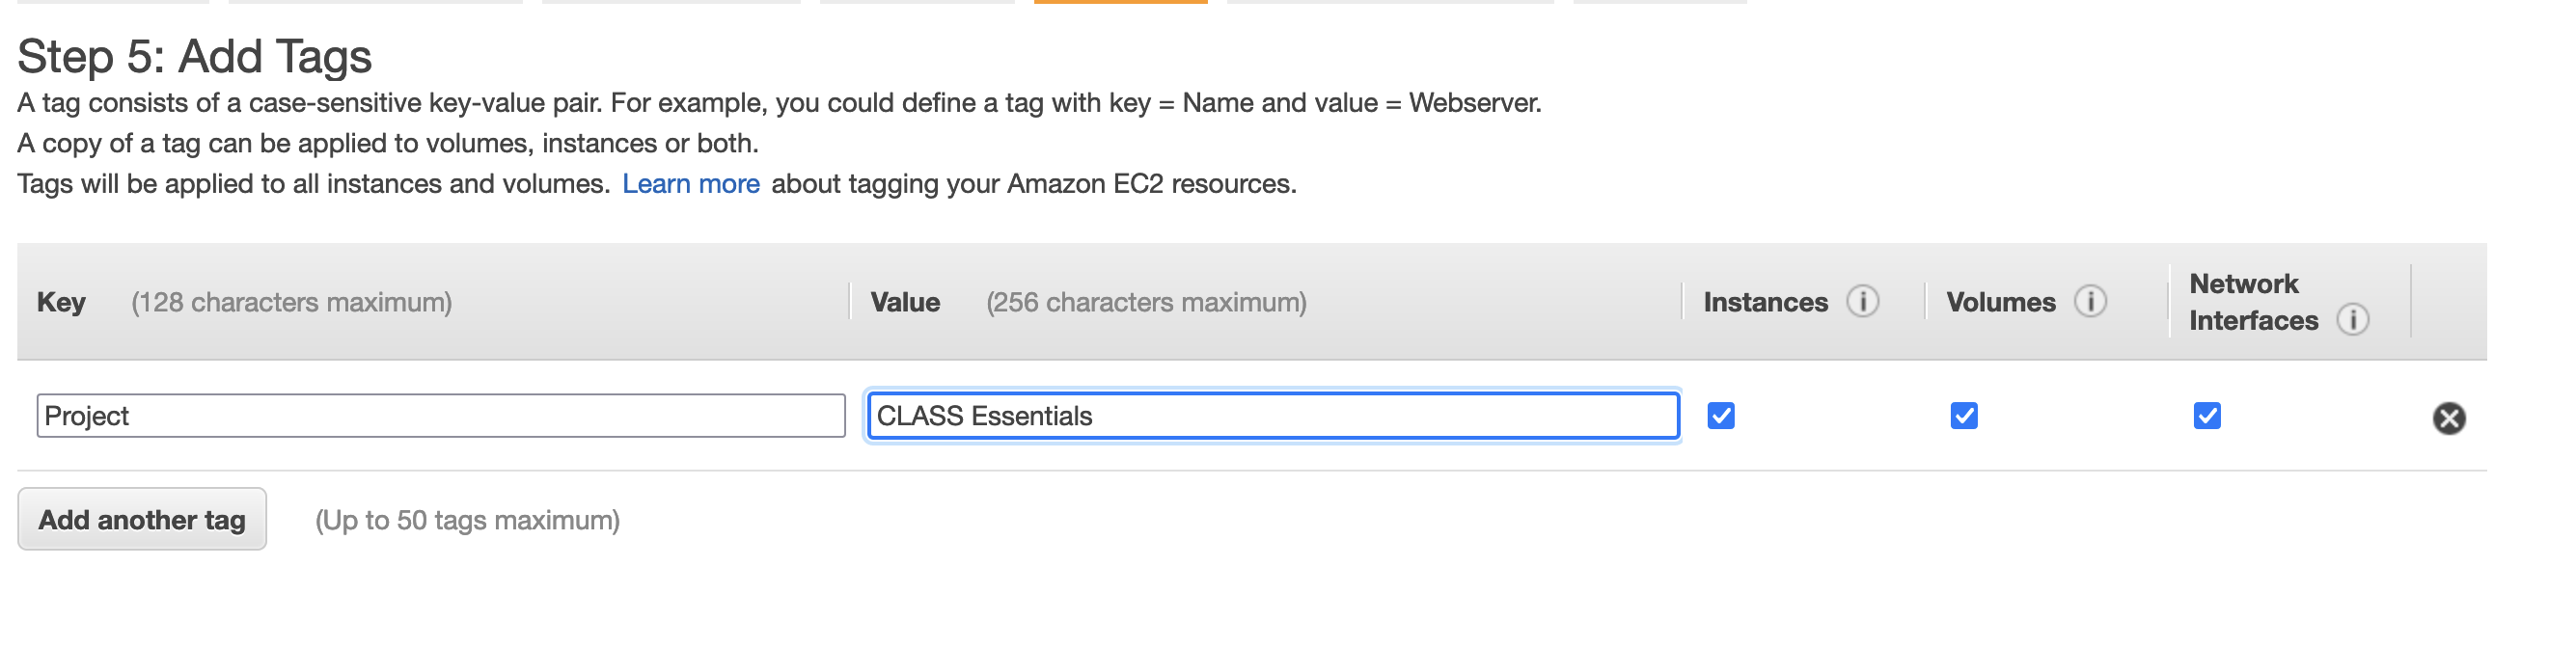
Step 5: Add Tags#
Tags are labels that you assign to an AWS resource. Each tag consists of a key and an optional value, both of which you define.Tags enable you to categorize your AWS resources in different ways, for example, by purpose, owner, or environment. Tags are an important mechanism to help you manage costs.
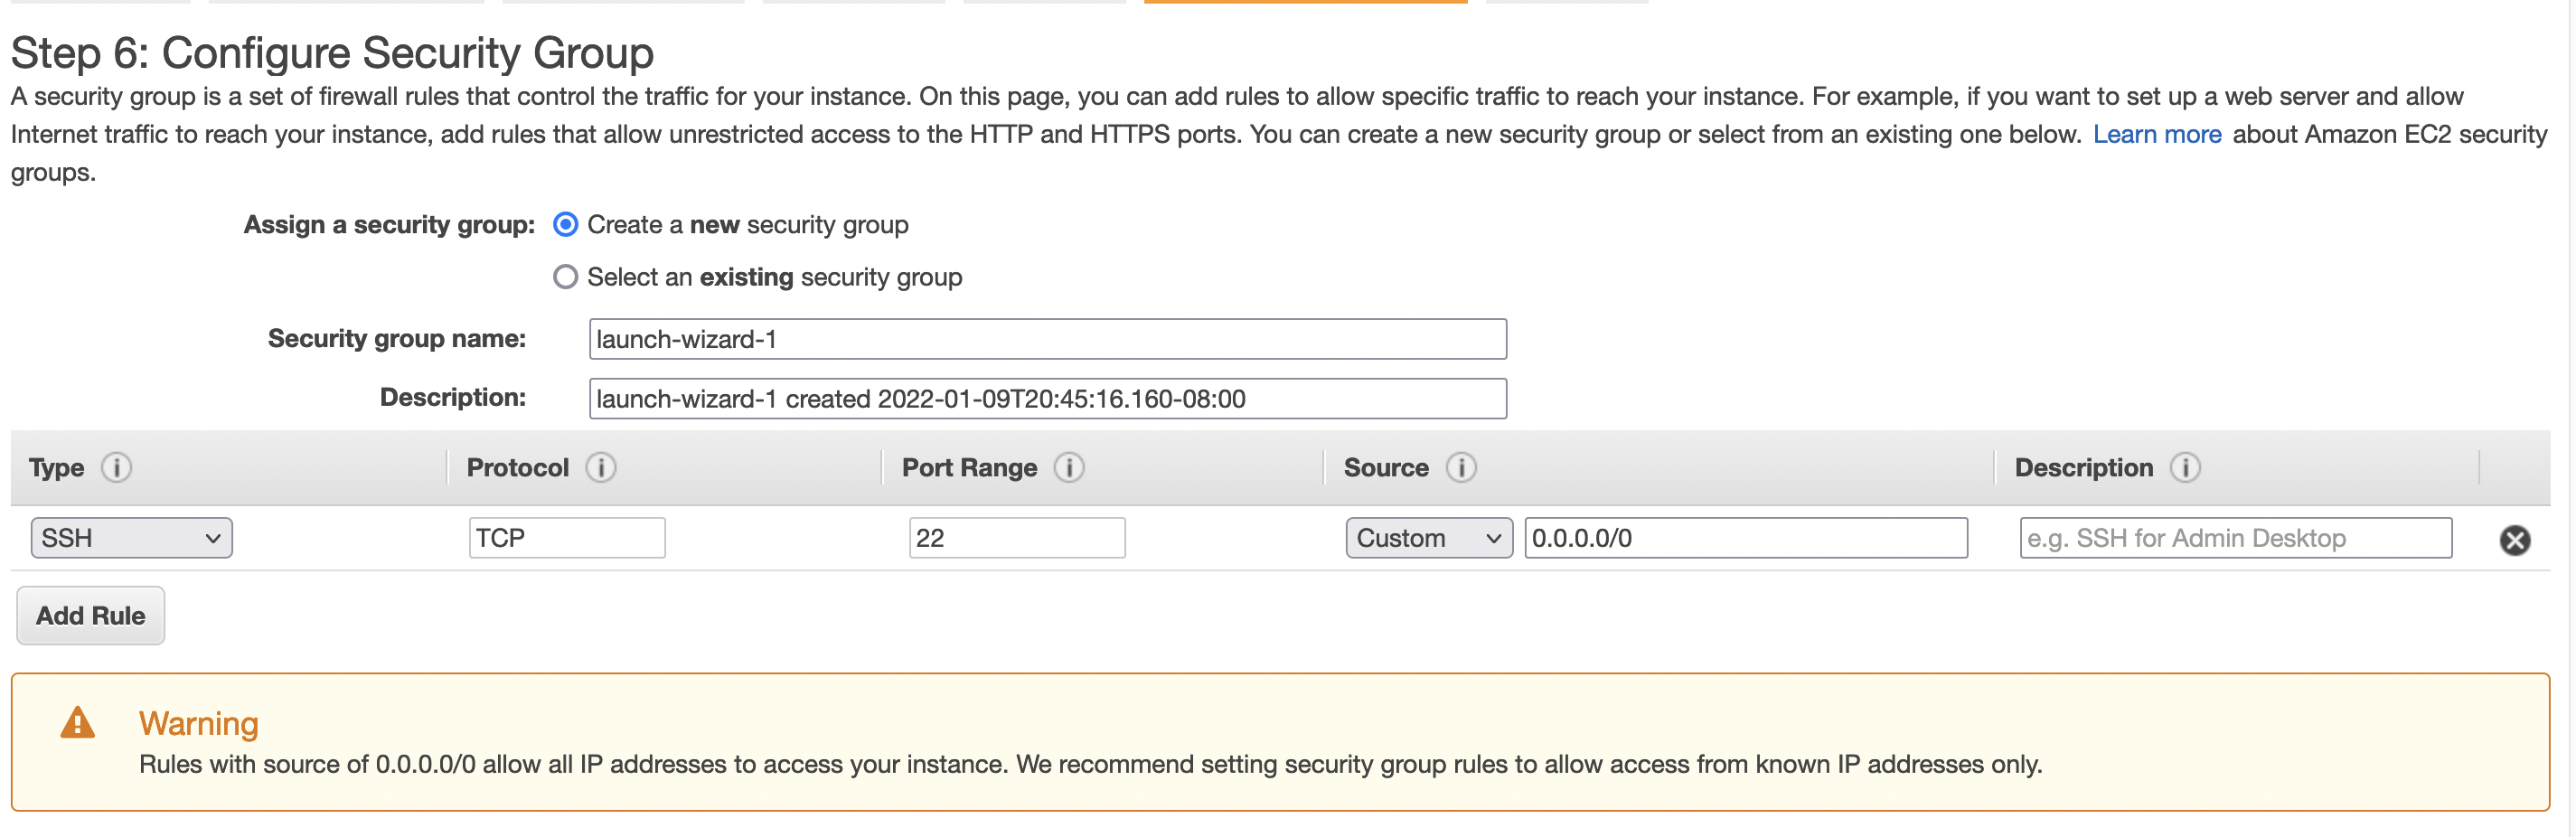
Step 6: Configure Security Group#
A security group acts as a virtual firewall for your EC2 instances to control inbound and outbound traffic. Again, we will not delve too much into networking protocols in CLASS Essentials. We will leave the default values of opening port 22.
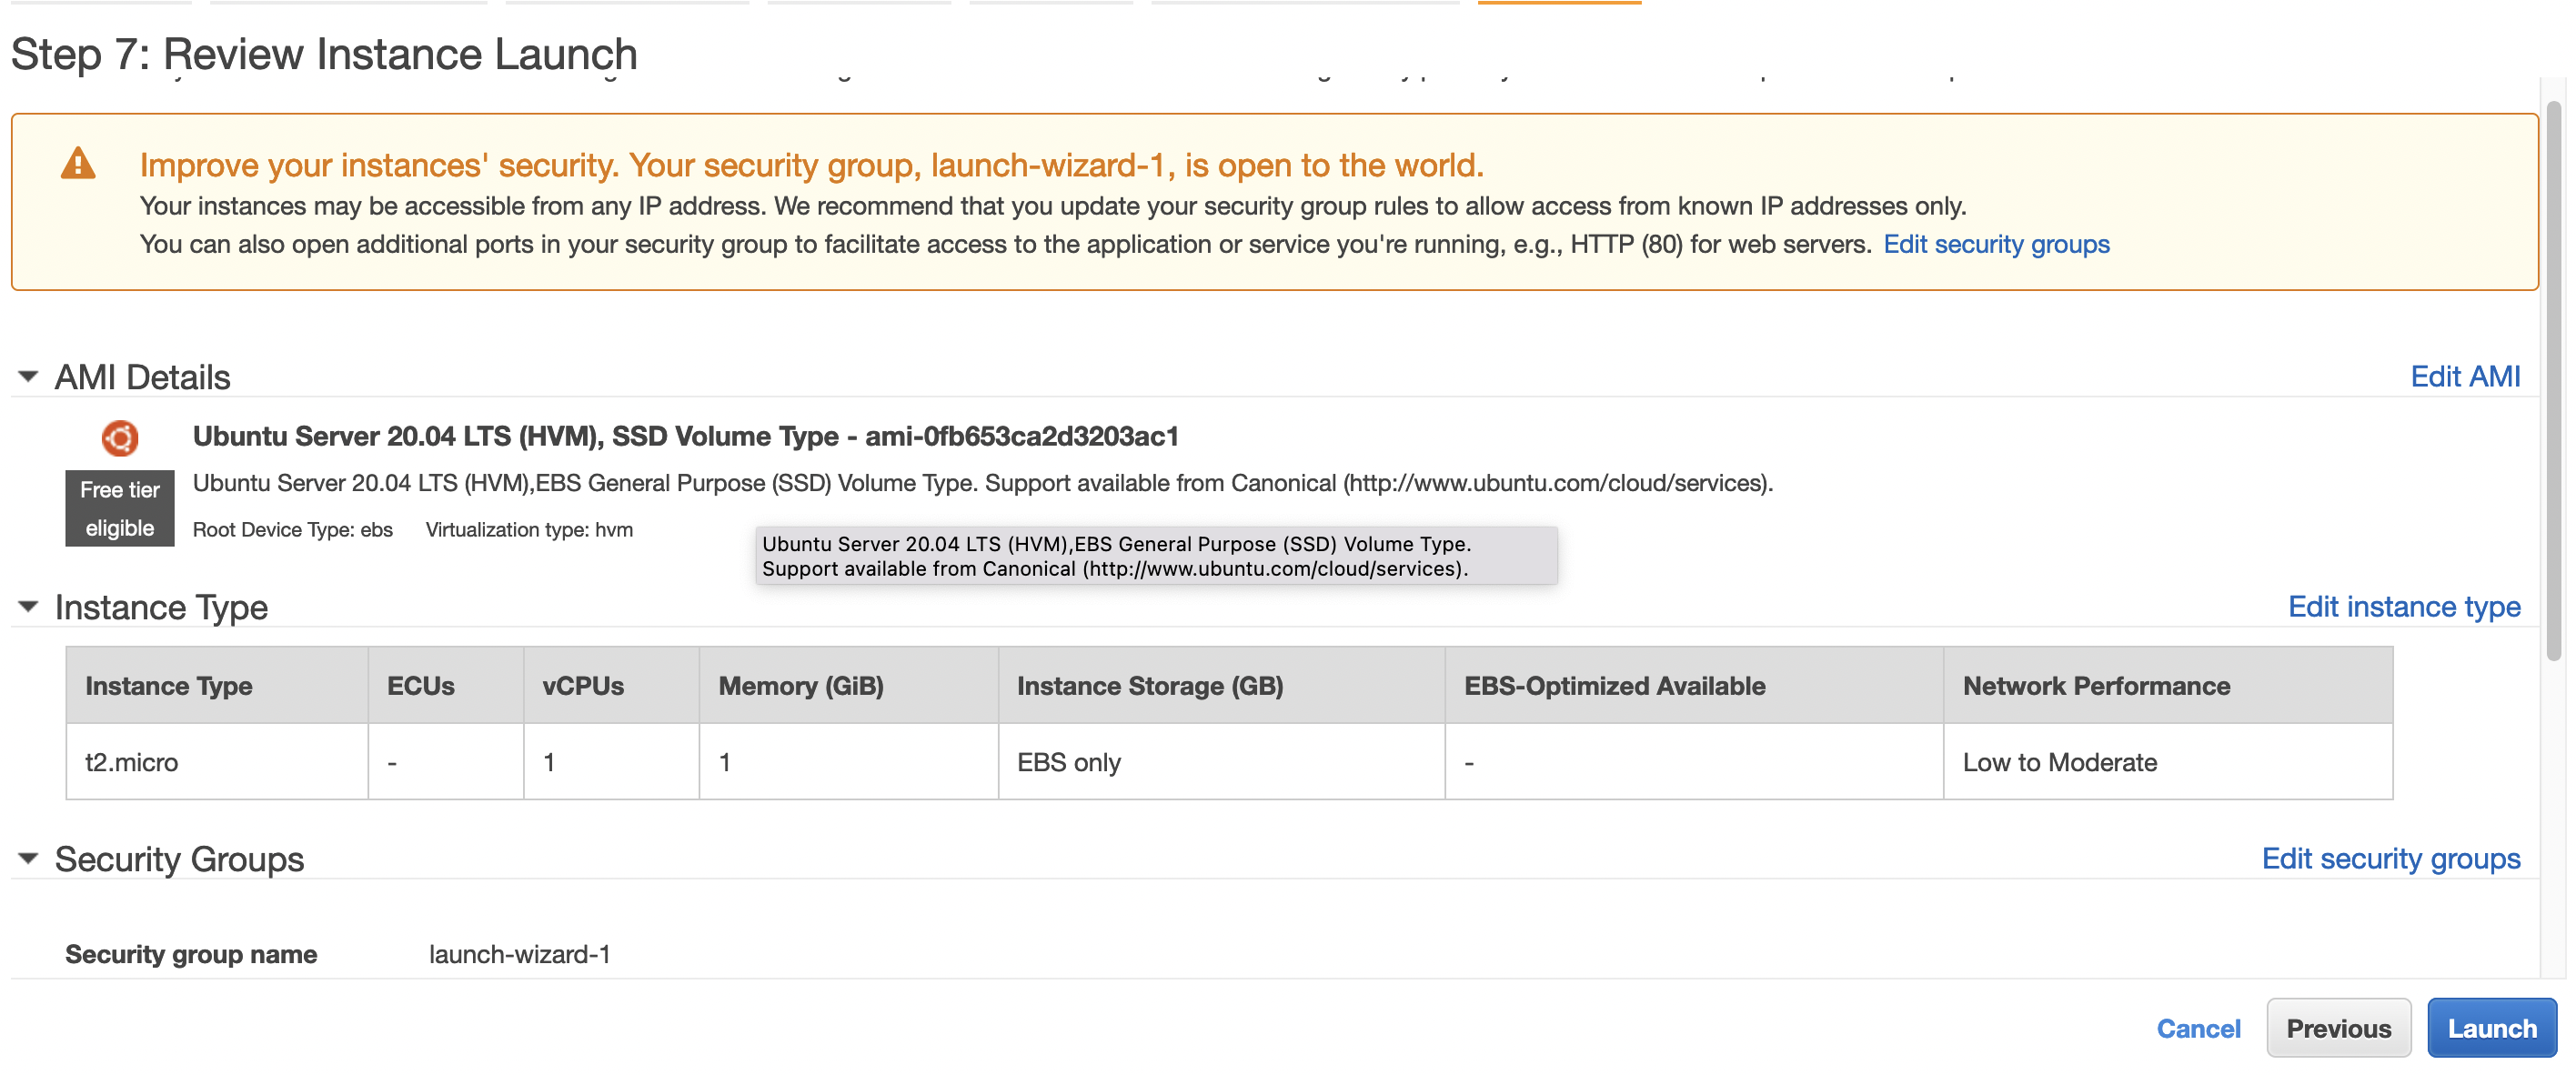
Step 7: Review Instance Launch#
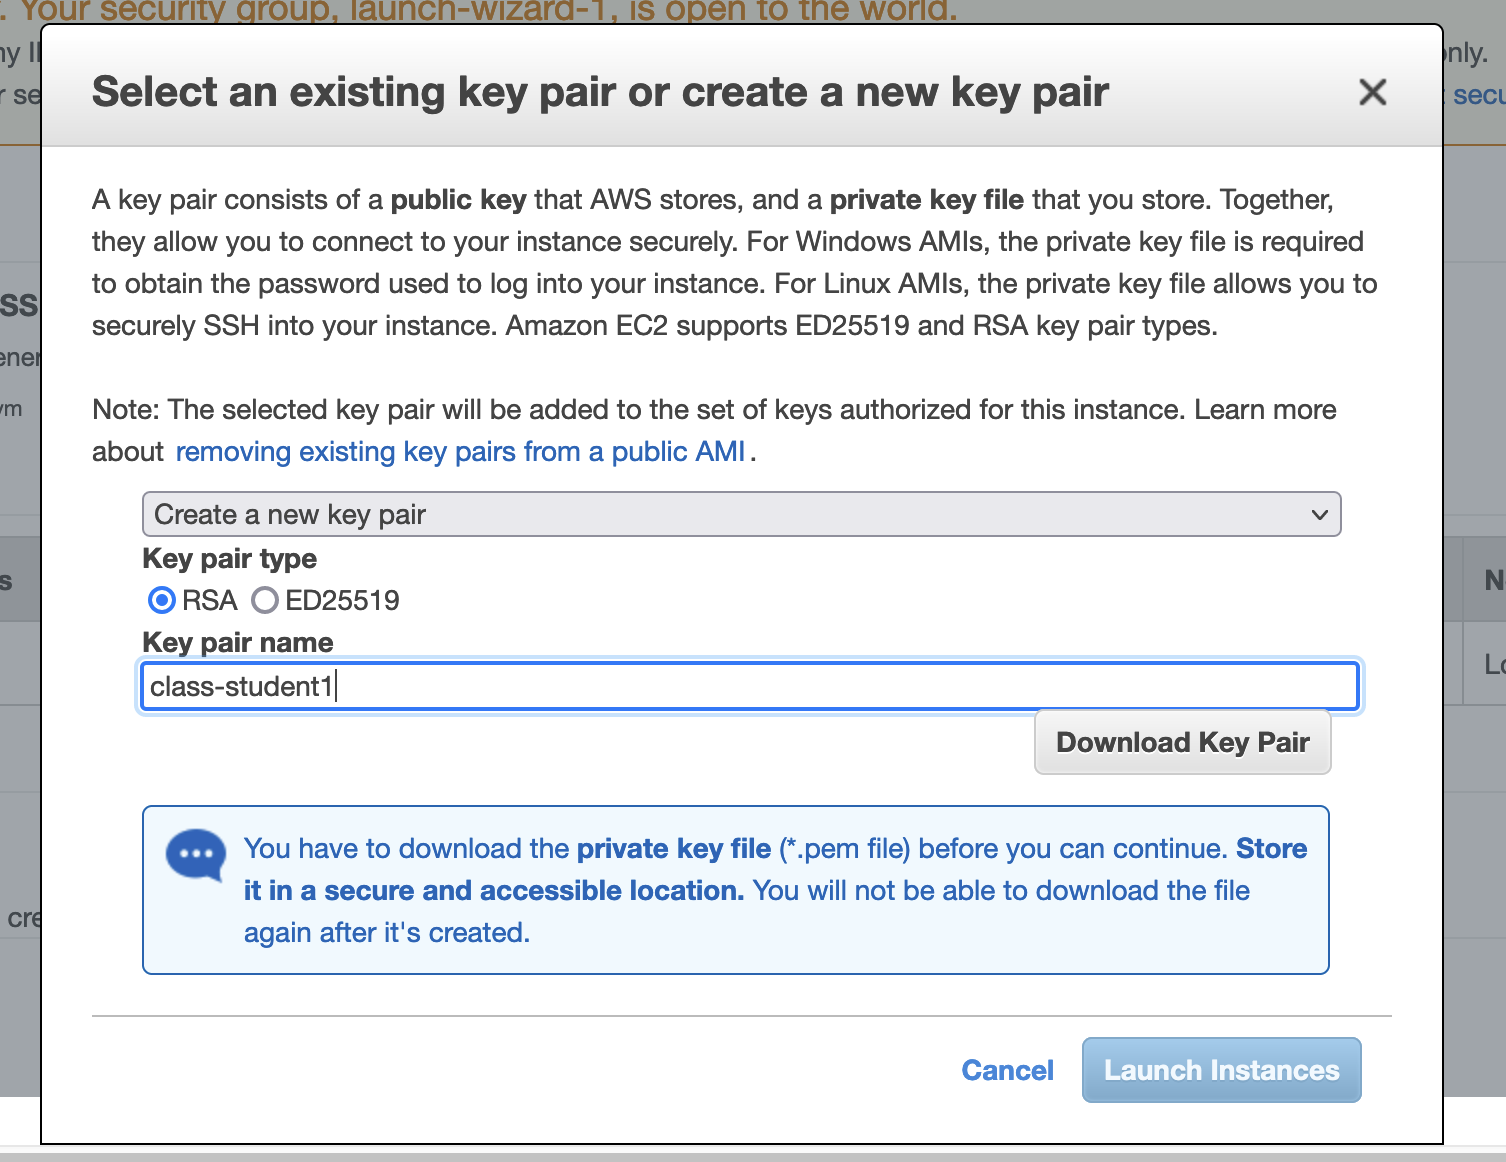
The final step before your instance is provisioned, is for you to review your setup. You will also be asked to Create a new key pair. This step is important if you will securely assessing your instance from outside the AWS console. Go ahead and give your key pair a name and select Download Key Pair. The Launch Instance button will then turn blue once you have downloaded your key pair.
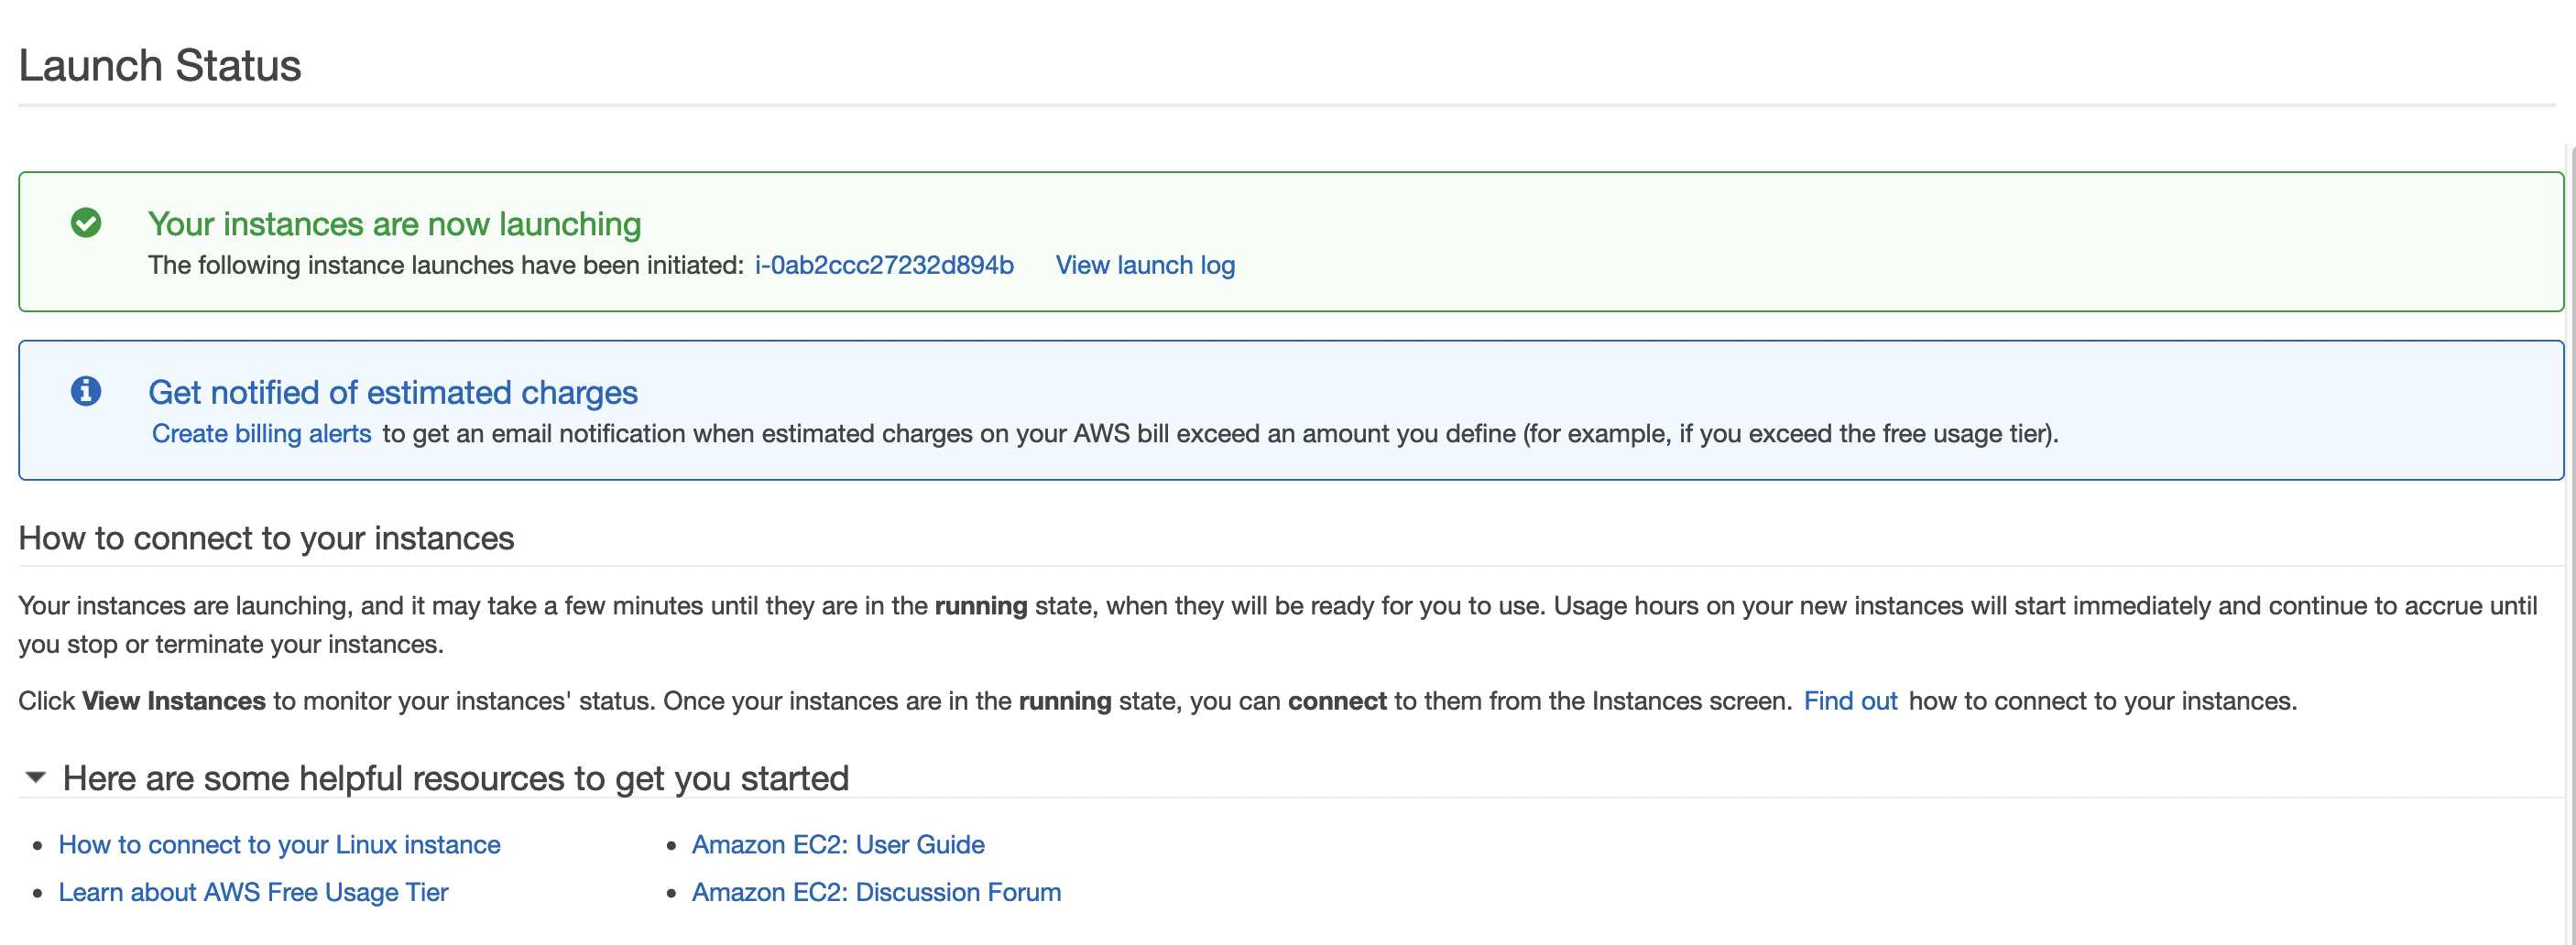
When you have launched the instance you will be immediately taken to the Launch Status page where you can see your instance being initiated.