Introduction to the Google Cloud Console
Contents
Introduction to the Google Cloud Console#
Overview
Teaching: 15 min.
Exercises: 6 min.
Questions:
How do I find things in the web console?
How do I access the cloud through the command line?
Objectives:
Login to the Google Cloud web console
Find and verify important information about your cloud environment.
Learn important Google Cloud terminology
Find and open the Cloud Shell
The Who, Where, and What of the Cloud#
Before we get started we must first define, and find, a few key pieces of information about your environment that will be used throughout this lesson. This information is also important to ensure that this information is what you expect, otherwise you may use the wrong account or run or store things in the wrong place. It is important to be clear about these terms as they are often different in other cloud providers. We provide a glossary of Google Cloud terms for your reference. Please note “Google Cloud” was formarly called “GCP”.
Accounts (Authentication and Identity)#
The (Google) Account is the identity used to access the Google Cloud web console and is in the form of an email address and is associated with an individual (the who is you!). This is typically the account you use to access Google services associated with your institution and not your personal account. This is the “Who” of the cloud. We will now login to the Google Cloud web console and verify our account.
Login to the web console with your (Google) Account by going to https://console.cloud.google.com/
Login with your credentials if you have not done so already.
Find your user/account under the “Avatar” in the top right (see below) and click on the avatar.
 and click on it if it is not the top one.
If you do not see your account click on “Add Account” and repeat the previous step.
The account list found under the avatar shows all the accounts that are logged in and the top one is the current active or selected account.
Exercise
Take a few moments to ask yourself the following questions:
What account are you currently using in the Google Cloud web console?
Are you logged into any other accounts?
How do you know which account is being used?
If you are not currently using the correct account, switch to it.
Projects#
Almost everything you will do within Google Cloud must be associated with a Project. This is the “Where” of the cloud. You must have at least one Project and you can manage multiple Projects within a single (Google) Account. Always make sure you are working in the correct project!
To find more information and change project settings
Click on the “Settings and Utilities button (kabob on the top right - see below) and then click on “Project Settings”
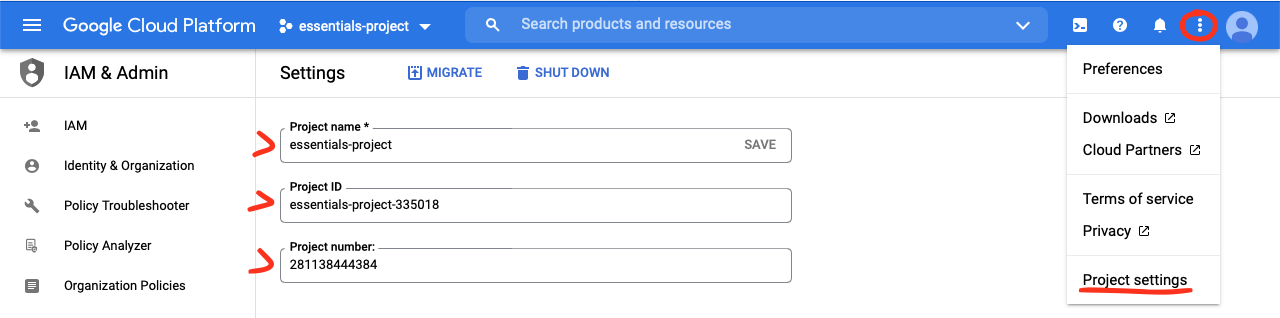
The Project Name is the human friendly description and can be changed.
The Project ID is set on project creation and cannot be changed. The Project ID is almost always used when specifying a project.
The Project Number is used internally by Google Services and is usually used indirectly. It is a good idea to be able to recognize this number.
For a Project to do anything useful it must also have an enabled Billing Account associated with it. An enabled Billing Account is a prerequisite for this lesson.
A Project, just like the word, should be associated with a real world project (for example a research effort or grant, lab, or your Ph.D. Project. etc). For Drew, this is the image processing project. In this way it is easier to track and allocate costs and to manage permissions and access for resources within the project. Work in a project should have similar people, lifecycle, and funding.
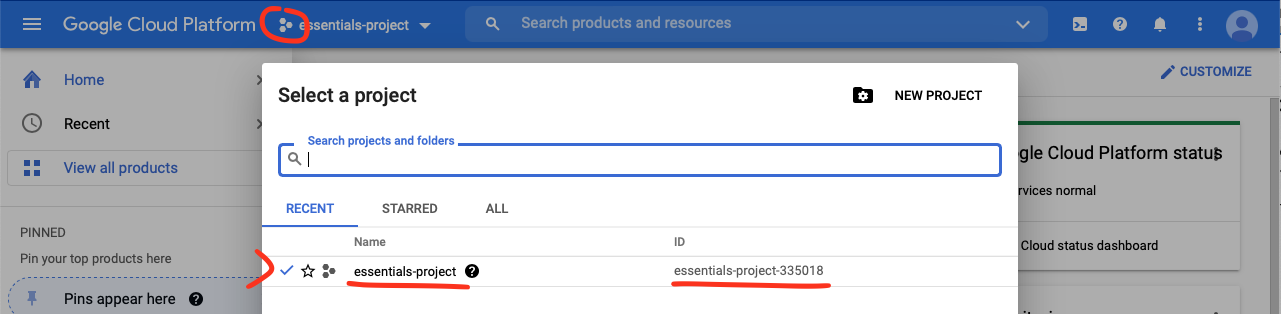
The active project is also shown next to the project icon (three hexagons) and clicking it brings up the project selection dialog. The current project has a check mark and the active project can be changed by clicking on the project name or double clicking the row.
Exercise
Take a few moments to ask yourself the following questions:
What is the name of the Project you are currently using in the Google Cloud web console?
What is the Project ID of that project?
What is the Project Number of that project?
Do you have multiple projects?
How do you know which project you are currently using?
If you are currently not using the correct project for this lesson, switch to the correct one.
Products#
Products are the various services offered on Google Cloud such as Google Compute Engine and Cloud Storage. Within each product you create resources that you can use, such virtual machines. The Navigation Menu (often called the hamburger) is used to navigate to the various products.
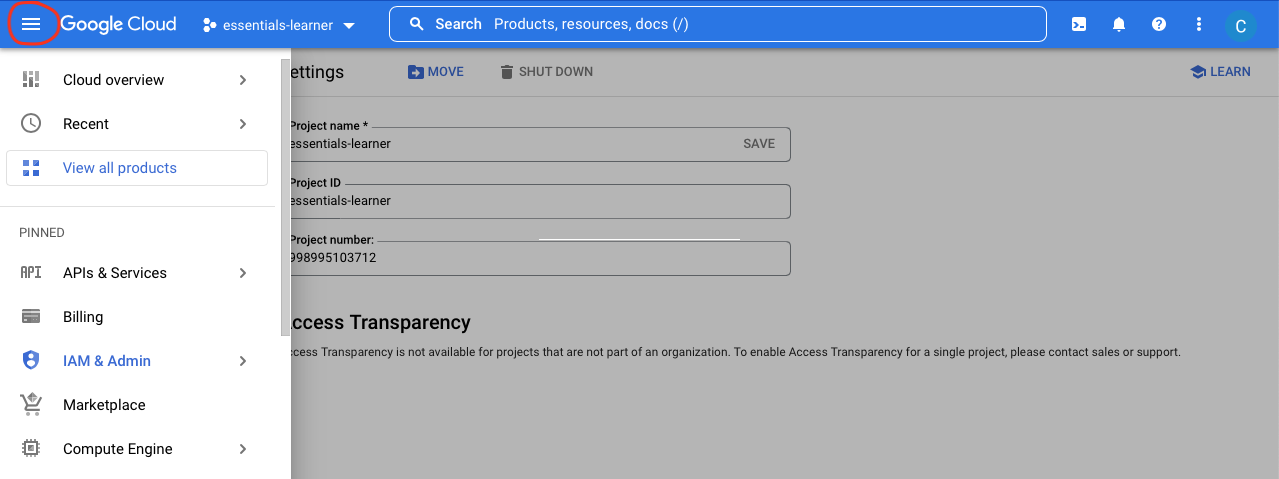
Click on a product to navigate the product page
You can pin frequently used items on the top of this page by clicking on the pin icon.
You can also navigate to products using the “MORE PRODUCTS” and “View All Products” buttons.
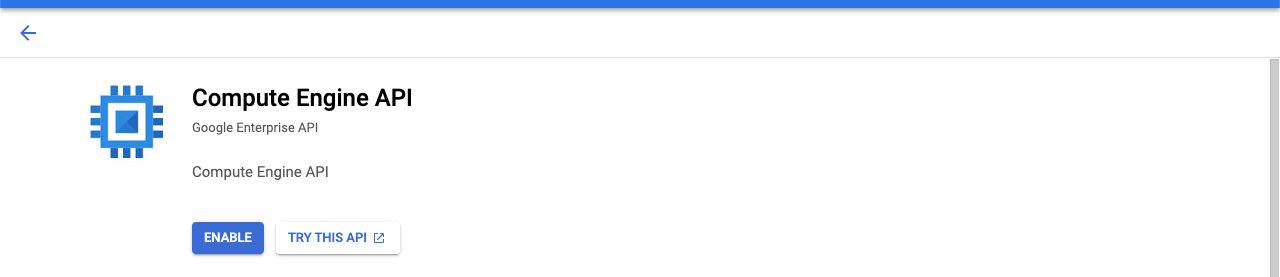
A product is accessed and controlled via an API and usually must be enabled (once per project). To enable a product API click on the “ENABLE” button shown below.
Click the hamburger again to hide the Left Sidebar.
All the different products and resources are the “What” of the cloud. We will start with compute, called Google Compute Engine in the next Episode.
Instructor: place instructions on the screen
Exercise 1
Take a few moments to navigate to a few key products and enable them.
Navigate to “Compute Engine” under the “Compute” product group.
You may need to expand the “MORE PRODUCTS” section by clicking on the down arrow.
You may need to “Enable” this product first by clicking on the “ENABLE” button on the “Compute Engine API” page. This will only need to be done once per project.
Navigate to the “Cloud Storage” product under the “Storage” product group and enable the product if needed.
Navigate to the “Compute Engine” and “Cloud Storage” products using the “All products” page using the “View All Products” button under the Navigation menu (Hamburger).
Everything Else#
If you did not already notice, every page on the Google Cloud web console has a blue navigation bar at the top of the page. This can be used to quickly navigate to the page you need.

From left to right of the blue top navigation bar we have the following items (hover over the item with your mouse to see the name):
Navigation Menu (often called the hamburger) allows you to go to each project and services page (shown below).
Welcome (“Google Cloud”) provides an overview of your project.
Click “Dashboard” it and note resources, billing, and platform Status
This page is customizable and may look different.
Project selection button showing the current project name with a drop-down arrow.
Search bar - type in service or keywords
Type in “Cloud Storage” and note results. Click to navigate to the Cloud Storage page.
Activate Cloud Shell (terminal icon) - start the Cloud Shell
Click it and note the shell that appears on the bottom of the page.
Help (shown as a question) - quick link to documentation
Notifications (shown as a bell) - a dot indicates unread notifications
Settings and Utilities (often called the kabobb) - shortcut to project settings
Google Account (avatar at the far right) - verify and switch accounts.
Open a Cloud Shell#
The Cloud Shell is an easy way to access the Comand Line Interface (CLI) in a web browser. Under the hood Cloud Shell is Linux (Debian) running in a container with 5GB of no-charge persistent storage with most of the Google utilities and a lot of other useful tools such as git, docker, jq, Docker, etc. installed by default.
To use the Cloud Shell:
Open up a Cloud Shell by clicking on the Activate Cloud Shell icon in the right side of the top blue bar. If a “Authorize Cloud Shell” dialog appears click “Authorize” to allow the Cloud Shell to access your Project.
Click the Maximize icon on the right side of the Cloud Shell bar. You can find the correct icon by hovering over the icons to see their names.
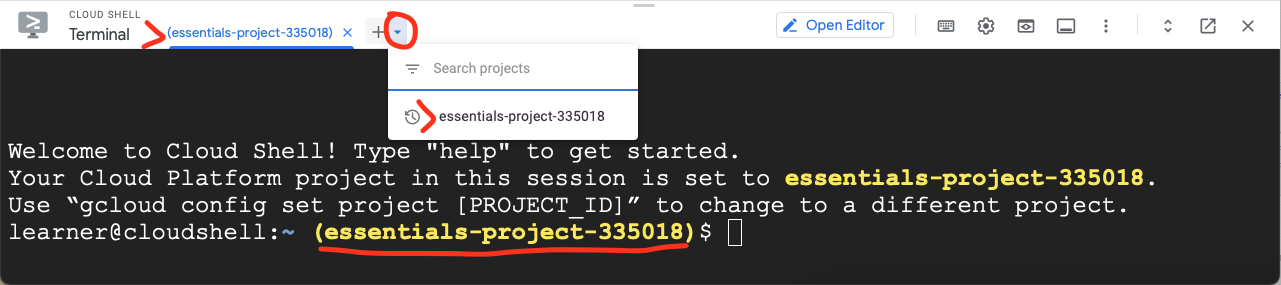
If a shell is associated with a project it will show it in the tab and in yellow text in round parenthesis in the shell prompt. Verify the Project ID.
To open up a shell with a specific project click the “down arrow” icon next to the plus(+) to open a new tab with a specific project. Selecting the plus (+) will usually open up a shell with the default project.
Note: You can open the Cloud Shell in a new tab by clicking on the Open in a New Window icon on the far right of the Cloud Shell bar.
Opening Cloud Shell in a Tab - Optional#
Click the Open in a New Window icon on the far left of the “Cloud Shell” tab on the bottom to open up in a separate tab. Hover the mouse over the icons to see their name/function. Note: you may need to allow popups or enable popups for this website depending on the browser you use. You can also pull up the tab to increase the shell screen size.
Click the “Close editor” button (the pencil icon in the top right of the window).
Putting it Together#
Now that we have the basics, we can provide a bit larger picture of the cloud and all the pieces:

Project - a container to house and manage resources.
Products - The different types of resources or services within Google Cloud.
Resources - individual products running or stored within Google cloud such as compute, storage, networking, databases, etc. Resources can belong to only one Project.
Billing Account - used to pay for resources and services consumed. Each project has only one billing account.
Account - the identity that is used to accesses resources within Google Cloud. Note: this is NOT the Billing Account.
Identity Access and Management (IAM) - manages access (permissions) to a resource by an account (also referred to as a principal).
Organization - projects may optionally be housed in an organization (arranged in folders), which can add permissions and restrictions in a hierarchical manner. Projects can only belong to one Organization.
Exercise
Before we move on, do the following:
Double check that you are in the correct account and project that you will be using for this lesson.
Take a moment to reflect on the “Who, Where, and What” of the cloud.
What is your Who, Where, and What?
Why is this important?