Introduction to Azure Storage
Contents
Introduction to Azure Storage#
Overview
Teaching:
Exercises:
Questions:
How do I store data in the cloud?
Objectives:
Navigate the Azure Storage service and terminology
Understand the roles and permissions needed to use Azure Storage
Create Storage Account
Allocate storage in Azure Storage
Find the cost estimator for Azure Storage
Recognize that resources have a “location”
Recognize danger of public access
De-allocate Azure Storage storage
One of the most common and economic ways to store data in the cloud is to use object storage. In Azure object storage is called blob storage, which is similar to the Simple Storage Service, also known as S3, on Amazon Web Services (AWS).
Azure Cloud Storage#
To learn more about the Azure blob Storage service we will use the web console to create, explore, and destroy a storage container. The ability to quickly create, explore, and then discard resources in the web-console is a powerful tool to explore a service. After an initial exploration with the web-console, programmatic access using scripts and programming languages should be used.
Unfortunately, the terminology used for object storage differs from one commercial cloud provider to another. Azure uses the terms Storage Container. Data is stored in Objects and Objects are stored in Containers. Objects (data) are stored as a key-value pair, which is similar to a Python dictionary but persistent. Values are stored and retrieved using a unique key and the value can contain any information (more on this later).
We now take Drew through the process of creating a Google Azure blob Storage.
Create storage account#
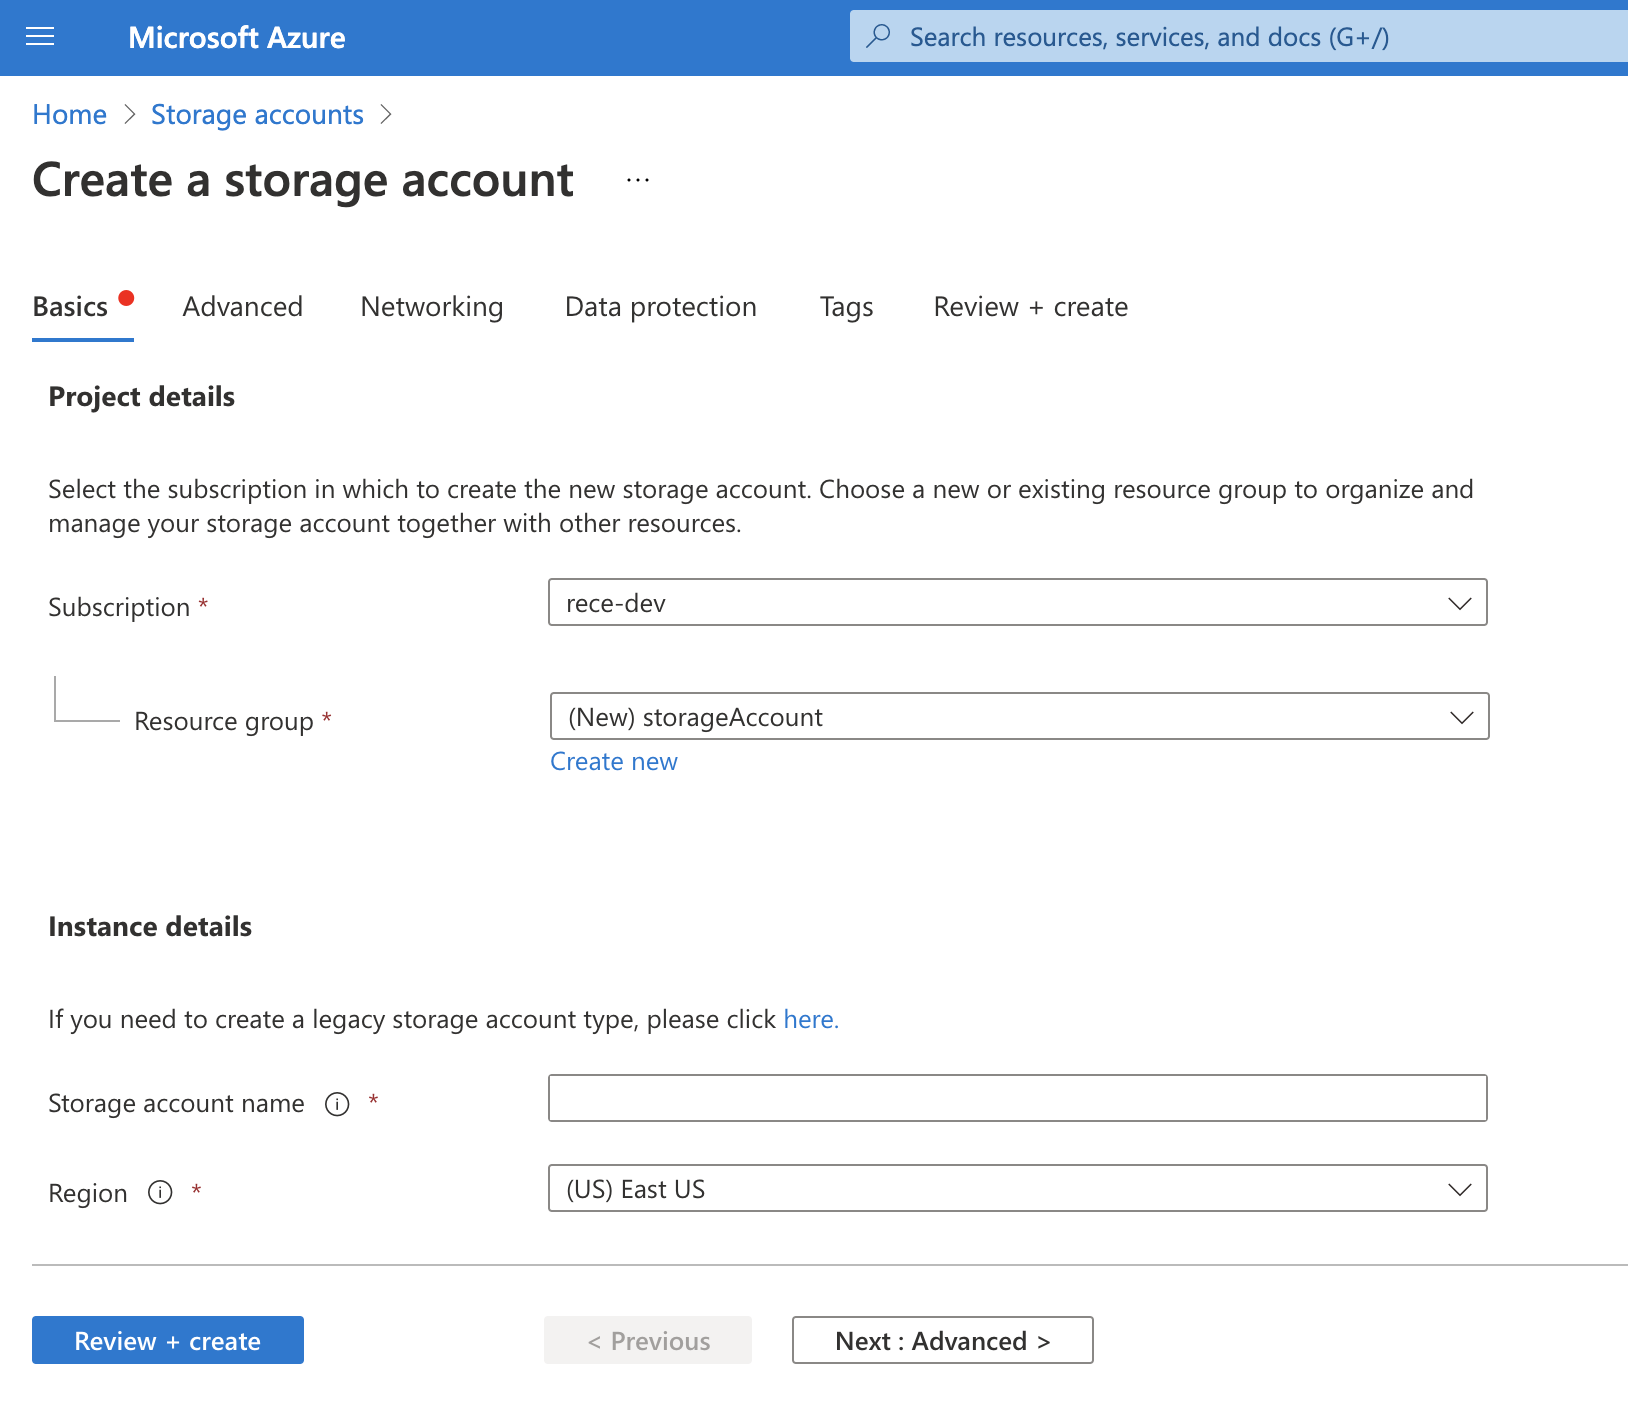
Like all things in Azure you will need an account to manage your service. In this case we need a storage account. To create a storage account, follow these steps.
Navigate to storage accounts
Click “+ create” in the upper left
Select (or create) a Resource Group
Select a name for your Storage account
The name must be all lower case and unique
Leave the rest as default
Click Review & Create

After passing validation, click create
The page will indicate when the account has been deployed. Click on “go to resource”
Allocate Azure Cloud blob Storage#
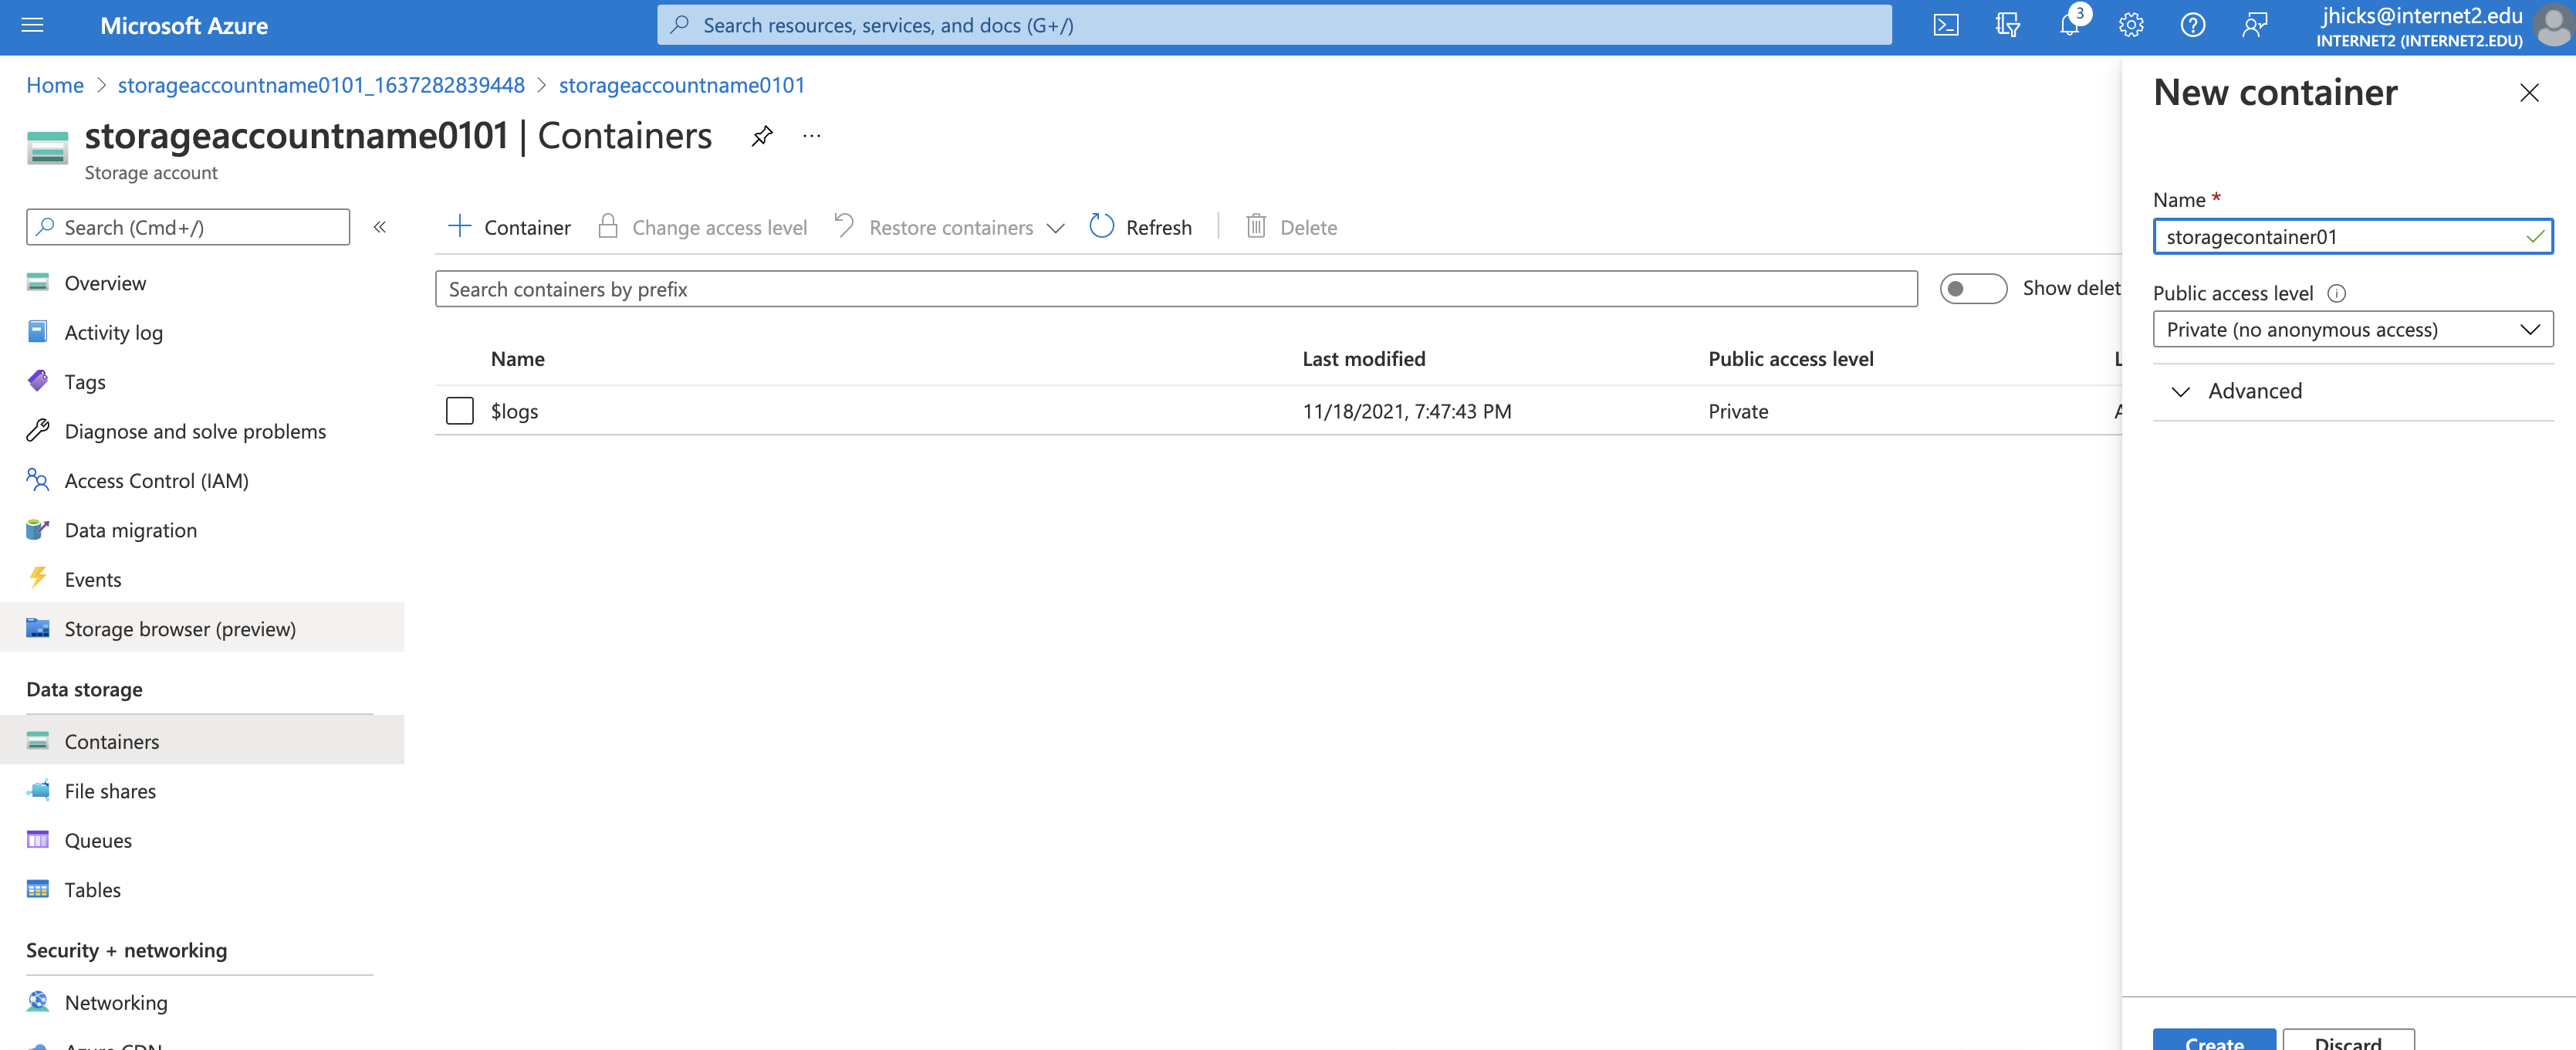
To create a blob storage container in the Azure portal, follow these steps:
Navigate to your new storage account in the Azure portal.
In the left menu of the storage account, scroll to the Data storage section, then select containers.
Select the + Container button to create a new blob storage container.
Over on the right side
Type a name for your new container.
Under the Public access level pulldown menu select Blob (annonymous read access for blobs only)
Select OK to create the container.

Now click on the container
This is where your blob objects can be viewed, uploaded, downloaded, & deleted.
Click “Upload”
In the Upload blob menu, either type in a file name or click on the icon to the right to browse your local filesystem.
Choose a file from your local filesystem
click upload
Follow the Store Allocation#
Enumerate the Buckets#
Now lets find and examine the bucket. To view a bucket we do the following:
Navigate to Storage Accounts in the Azure portal and select your new storage account.
In your storage account select containers
Under containers you should see the container you created in the previous step
This verifies that a storage container was deployed
Delete the Storage#
To complete the resource life-cycle we simply delete the storage container created in this lesson. All blobs in the container will also be deleted. This will leave you with a storage account that can be used again for additional stoarge services.
To delete the container:
In the Azure portal, navigate to the list of containers in your storage account.
Select the container to delete.
Select the More button (…), and select Delete.
Confirm that you want to delete the container.
Discussion#
What does the words “Secure”, “Allocate”, “Follow”, and “Enumerate” spell?
What happens when you add the “R” in “Review?”
Is this useful?

